Refreshing Summer Delight: Watermelon Kiwi Layered Pops
As the sun shines brighter and the temperatures rise, the craving for refreshing summer treats becomes undeniable. During these warm months, finding a way to indulge in something sweet while keeping it light and healthy is essential. Enter the Watermelon Kiwi Layered Pops – a vibrant and delicious frozen treat that not only cools you down but also provides a burst of nutrition. These layered popsicles are not just a feast for the taste buds but also a visual delight, showcasing the beautiful colors of nature’s finest fruits.
At the heart of this recipe are two star players: watermelon and kiwi. Watermelon, with its juicy and sweet flesh, is synonymous with summer. This fruit is not only hydrating but also packed with vitamins and antioxidants, making it a perfect choice for a healthy treat. Kiwi, on the other hand, brings a tangy flavor and additional health benefits, including a high vitamin C content and fiber that supports digestive health. Together, these ingredients create a popsicle that is as nutritious as it is enjoyable.
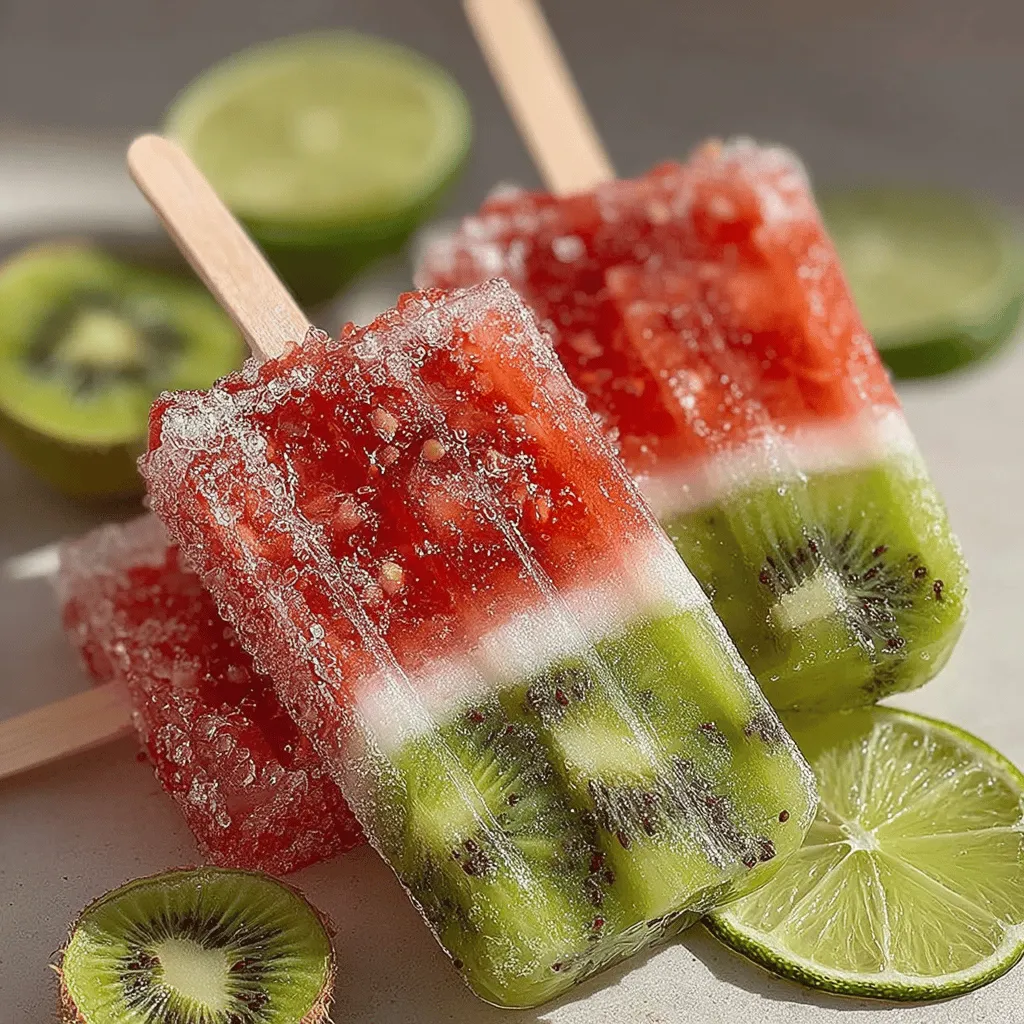
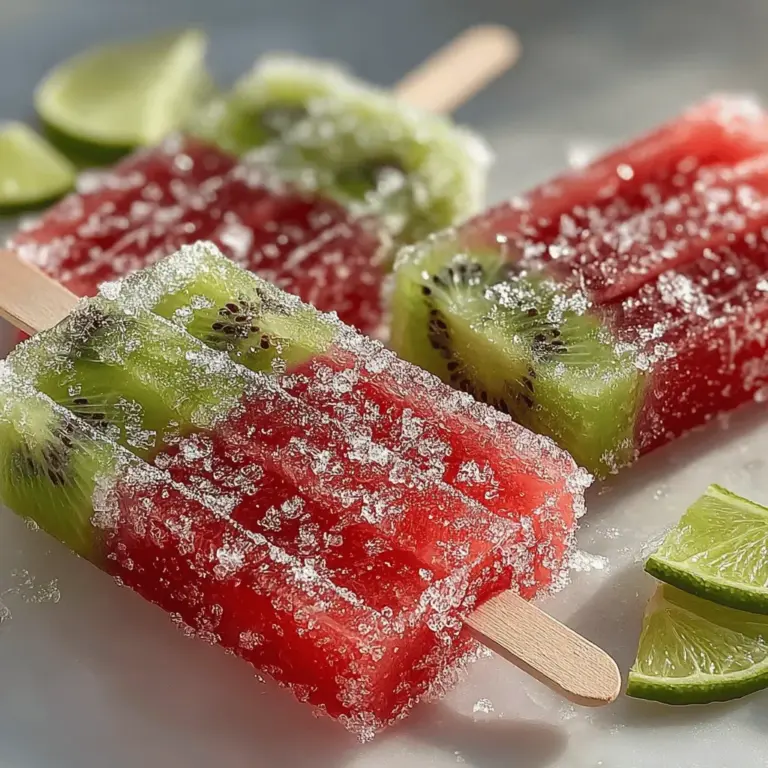
Layered popsicles have gained popularity not just for their refreshing taste but also for their eye-catching presentation. The striking contrast between the vibrant pink of watermelon and the bright green of kiwi makes these popsicles a standout addition to any summer gathering. Each layer offers a different flavor experience, making every bite a delightful surprise.
The Health Benefits of Watermelon and Kiwi
Before diving into the recipe, it’s essential to understand the health benefits of the key ingredients. Watermelon is composed of about 92% water, making it an excellent choice for hydration during hot summer days. It’s rich in vitamins A and C, which are crucial for maintaining healthy skin and boosting the immune system. Additionally, watermelon contains antioxidants like lycopene, which is known for its potential health benefits, including heart health and reduced inflammation.
Kiwi is another nutritional powerhouse. Just one medium kiwi provides more vitamin C than an orange, along with a good source of dietary fiber that aids digestion. The small, edible seeds in kiwi also contribute to its fiber content. Moreover, kiwi is known to contain actinidain, an enzyme that can help break down proteins and support better digestion. This makes kiwi an excellent addition to a summer diet, especially when paired with the hydrating qualities of watermelon.
Incorporating fresh fruits like watermelon and kiwi into your summer meals is a fantastic way to enjoy the season’s bounty while nourishing your body. These fruits not only enhance your hydration levels but also provide essential nutrients that can help you feel your best during the heat of summer.
Ingredients Breakdown
Now that we’ve established the health benefits, let’s take a closer look at the ingredients you will need to create these delightful layered popsicles:
1. Seedless Watermelon: The main ingredient for the first layer, seedless watermelon is known for its sweet, juicy flavor and smooth texture. It’s low in calories and high in hydration, making it a perfect summer fruit. Watermelon is also rich in vitamins A, B6, and C, and contains antioxidants that help fight free radicals in the body.
2. Lime Juice: A splash of lime juice enhances the watermelon layer, adding a bright, tangy flavor that balances the sweetness. Lime juice is also packed with vitamin C and can aid in digestion.
3. Honey or Agave Syrup: Depending on your sweetness preference, you can use honey or agave syrup to sweeten your layers. Both natural sweeteners offer a healthier alternative to refined sugar and can enhance the overall flavor of the popsicles.
4. Kiwi: The star of the second layer, kiwi provides a unique tartness that complements the sweetness of watermelon beautifully. In addition to its nutritional benefits, kiwi adds a vibrant green color to the popsicles.
5. Coconut Water: To enhance the kiwi layer, coconut water is used for its hydrating properties. It gives the pops a subtle tropical flavor while also contributing essential electrolytes, making it an excellent choice for summer treats.
Step-by-Step Instructions for Making Watermelon Kiwi Layered Pops
Now that you have all your ingredients ready, it’s time to embark on the fun part: making your Watermelon Kiwi Layered Pops. Follow these steps to create a refreshing treat that will be the highlight of any summer gathering:
Preparing the Watermelon Layer
1. Cut and Blend: Start by cutting your seedless watermelon into chunks. Place the chunks in a blender and blend until you achieve a smooth puree. If you prefer a finer texture, you can strain the puree through a fine mesh sieve to remove any pulp.
2. Sweeten to Taste: After blending, taste your watermelon puree. If it needs a little extra sweetness, add honey or agave syrup, mixing well until dissolved. The sweetness can be adjusted based on the natural sweetness of the watermelon, so feel free to experiment until you find your ideal balance.
3. Add Lime Juice: Squeeze fresh lime juice into the watermelon puree, which will not only enhance the flavor but also add a refreshing zing.
4. Pour into Molds: Carefully pour the watermelon mixture into your popsicle molds, filling them about halfway. Insert sticks into the molds and freeze for about 2-3 hours, or until the watermelon layer is solid.
Creating the Kiwi Layer
1. Blend the Kiwi: While the watermelon layer is freezing, prepare the kiwi layer. Peel and slice your kiwis, then place them in the blender. Add a splash of coconut water to help with blending.
2. Texture and Sweetness: Blend the kiwi until smooth. Similar to the watermelon layer, taste the mixture and add agave syrup if you prefer a sweeter flavor. The coconut water will not only help with the blending process but will also enhance the tropical flavor profile of the pops.
3. Layering Technique: Once the watermelon layer is frozen solid, carefully pour the kiwi mixture over it, filling the molds to the top. To create a marbled effect, you can use a skewer to gently swirl the layers together without fully mixing them.
4. Final Freeze: Insert the sticks back into the molds and freeze the pops for an additional 4-6 hours, or until completely solid.
Creating these Watermelon Kiwi Layered Pops is not just an enjoyable cooking experience; it’s also a way to embrace the flavors of summer while providing a healthy, hydrating treat for yourself and your loved ones. The combination of watermelon and kiwi, along with the layering technique, results in a popsicle that is both delicious and visually appealing, making it an ideal addition to any summer gathering.

Importance of Layering for Aesthetic Appeal
Layering is not only crucial for the visual appeal of your Watermelon Kiwi Layered Pops but also enhances the overall taste experience. Each layer brings a unique flavor and color, creating a stunning gradient that entices anyone who sees it. The vibrant green of the kiwi and the bright red of the watermelon not only look beautiful, but they also signify the freshness of summer. This aesthetic element makes these pops perfect for summer parties, family gatherings, or simply as a refreshing treat for yourself on a hot day.
Tips for Filling Molds Without Creating Air Bubbles
When filling your popsicle molds, it’s essential to avoid air bubbles, which can disrupt the layers and create an unappealing texture. Here are some effective tips to ensure a smooth filling process:
1. Pour Slowly: When adding each layer, pour the mixture slowly and steadily into the molds. This minimizes the chances of air bubbles forming.
2. Tap the Molds: After filling each layer, gently tap the molds on a flat surface. This action helps release any trapped air bubbles that may have formed during pouring.
3. Use a Funnel: If your molds have narrow openings, consider using a funnel to direct the liquid into the molds more accurately, reducing splashes and air pockets.
4. Layer Wisely: Allow each layer to set slightly before adding the next. This not only prevents mixing but also helps in eliminating bubbles that can arise when layers are too runny.
Freezing Process
Freezing is the most critical part of making layered pops. The key to perfect pops lies in the freezing process, where patience is essential. Here’s how to navigate this stage effectively:
Explanation of Freezing Times and the Importance of Patience
After filling the molds with the first layer, place them in the freezer for about 30-60 minutes or until the layer is set but not completely frozen. This allows the next layer to adhere well without mixing. It’s crucial to check frequently to avoid freezing the first layer solidly, which could make adding the second layer difficult.
For the second layer, repeat the freezing process. Each layer should ideally freeze for 30 minutes before adding the next. If you’re adding more layers, the same rule applies. The total freezing time for the pops will vary, but generally, the pops should freeze for at least 4-6 hours before they are ready to be unmolded.
How to Tell If the Layers Are Set Properly
To determine if your layers are set properly, gently touch the surface of the pops with your fingertip. If it feels firm and doesn’t stick to your finger, it’s ready for the next layer. If it’s still wet or sticky, allow more time in the freezer. You want each layer to be solid enough to hold the weight of the next without collapsing or mixing.
Unmolding the Pops
Once your pops have been adequately frozen and all layers are set, it’s time to unmold them. Follow these steps for a successful release:
Step-by-Step Guide to Releasing the Pops Without Breaking
1. Warm the Molds: To help release the pops, run warm water over the outside of the molds for a few seconds. This slight heat will loosen the pops without melting them.
2. Twist Gently: If your molds are flexible, gently twist the mold to help dislodge the pops. If they’re rigid, you may need to use a butter knife to carefully pry the edges.
3. Pull Slowly: Once the pops are loosened, pull them out slowly and steadily. This reduces the risk of breaking them. If they resist, return them to the freezer for a few more minutes before trying again.
Tips for Serving and Presentation
Presentation can elevate your Watermelon Kiwi Layered Pops to another level. Here are some simple yet effective tips:
1. Serve on a Colorful Plate: Use a bright, colorful plate or tray to contrast against the pops, making them visually appealing.
2. Garnish: Consider adding a sprig of mint or a slice of fresh kiwi on the side as garnish for a pop of color and an additional hint of flavor.
3. Display in a Bucket: For parties, display the pops in a bucket filled with ice, giving a fun summer vibe while keeping them cool.
4. Pair with Dipping Sauces: Serve with a complementary sauce, like yogurt or chocolate, for those who want to dip their pops for an extra treat.
Creative Variations to Try
While watermelon and kiwi create a delightful combination, there are numerous creative variations you can explore. Here are some ideas to inspire your next batch of layered pops:
Suggestions for Using Different Fruits or Flavors
1. Berry Medley: Substitute strawberries, blueberries, and raspberries for a berry burst. Layer them in the same manner for a colorful and tangy alternative.
2. Tropical Twist: Use mango and pineapple for a tropical flavor. The sweetness of these fruits pairs wonderfully and brings a refreshing taste reminiscent of beach vacations.
3. Citrus Fusion: Create layers of orange and lemon or lime for a zesty and tangy pop that’s perfect for hot weather.
Alternatives to Watermelon and Kiwi for Seasonal Variations
1. Peach and Coconut: Use blended peaches for the bottom layer and coconut water for the top for a creamy and sweet summer treat.
2. Cantaloupe and Honeydew: These melons can be a fantastic alternative, providing a sweet and juicy flavor profile.
Experimenting with Flavors Like Mint or Basil
Add a twist to your pops by incorporating herbs such as mint or basil. Blend a handful of fresh mint or basil leaves into your fruit mixtures for an aromatic enhancement that complements the sweetness of the fruit.
Adding Additional Layers or Textures
Feel free to get creative with your layers! Consider including a yogurt layer between the fruit layers for added creaminess or a sprinkle of granola for a crunchy texture.
Ideas for Adding Yogurt or Other Creamy Layers
For a richer treat, layer Greek yogurt mixed with honey between the fruit layers. This option not only adds creaminess but also a protein boost, making it a great snack for both kids and adults.
Combining with Other Fruits for a Mixed Fruit Experience
Combine various fruits to create a mixed fruit experience. For instance, layer strawberry puree with peach puree for a delightful summer combination that’s both visually appealing and delicious.
The Perfect Summer Treat
Watermelon Kiwi Layered Pops are the ideal summer treat, embodying refreshment, health, and fun. Their versatility makes them suitable for various occasions:
1. Family Gatherings: Impress your guests with these homemade pops at your next family barbecue or gathering. Their vibrant colors and refreshing flavors will be a hit among both kids and adults.
2. Picnics and Pool Parties: These pops are easy to transport and serve, making them perfect for picnics in the park or pool parties. Just pop them in a cooler, and you’re ready to go!
3. Healthy Snack Options: Unlike store-bought popsicles filled with sugar and artificial flavors, these homemade versions allow you to control the ingredients, making them a healthier choice for everyone.
4. Homemade vs. Store-Bought: The satisfaction that comes from creating your own treats at home is unparalleled. You can tailor flavors, adjust sweetness, and even experiment with textures, ensuring your pops are exactly how you like them.
5. Controlling Ingredients and Flavors: By making your pops, you can avoid preservatives and artificial ingredients often found in commercial products. This control allows you to provide healthy, wholesome snacks for your family.
Conclusion
Watermelon Kiwi Layered Pops are a delightful way to embrace summer’s bounty. These pops offer not only a refreshing treat but also a canvas for creativity with flavors and textures. As you make these pops at home, you’ll experience the joy of using fresh, seasonal fruits while crafting a treat that’s healthier than store-bought alternatives. So gather your ingredients, get creative with flavors, and enjoy these homemade pops all summer long. Embrace the season, savor the flavors, and indulge in the refreshing treat that is Watermelon Kiwi Layered Pops!


