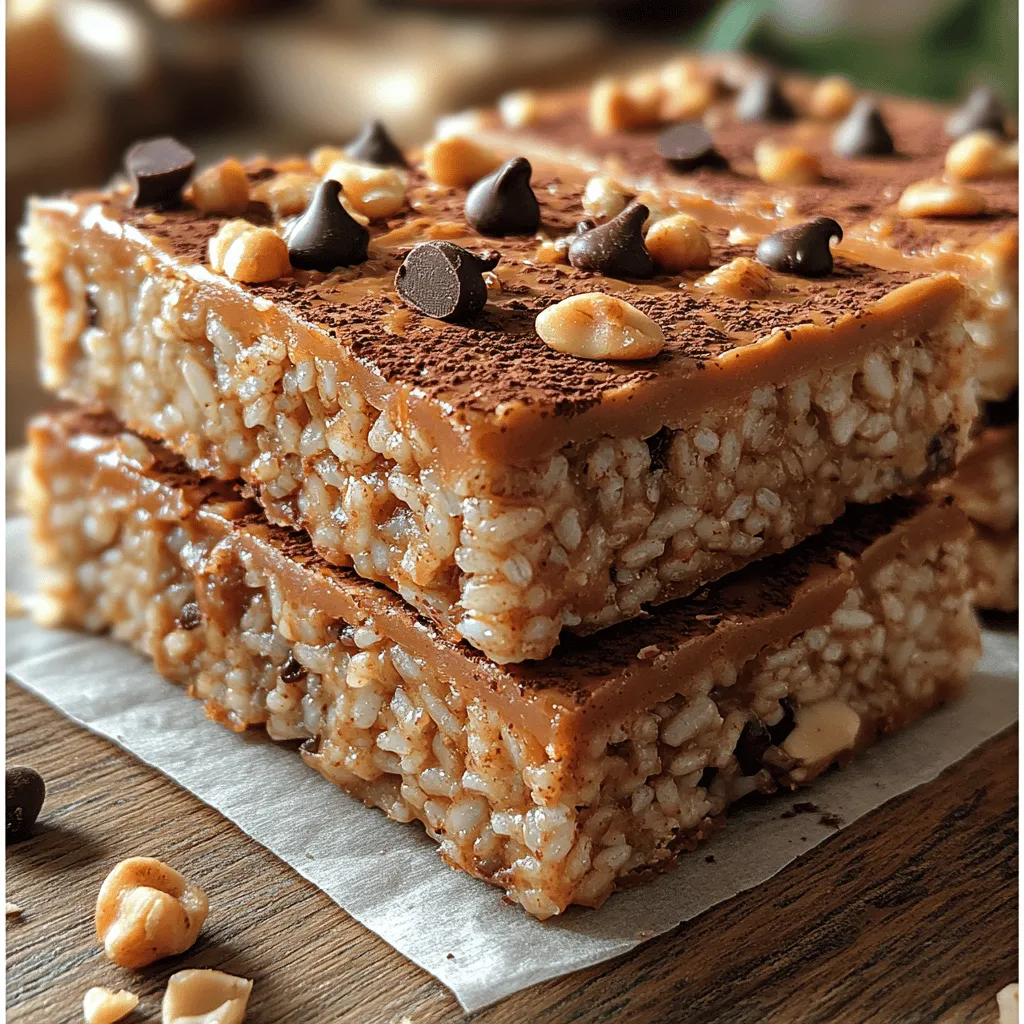
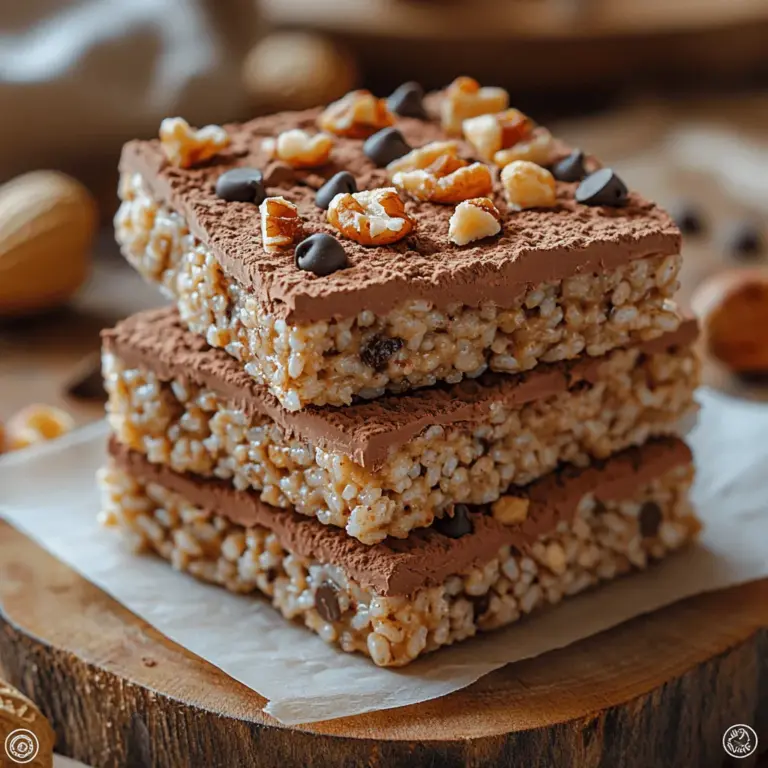
Crunchy Peanut Butter Rice Bars: An Irresistible Treat for All Occasions
If you’re in search of a delightful snack that combines taste, nutrition, and convenience, look no further than crunchy peanut butter rice bars. These bars are not only a treat for your taste buds but also a powerhouse of energy, making them perfect for busy days, post-workout recovery, or a sweet indulgence any time you need a little pick-me-up. With their satisfying crunch and rich flavors, these bars appeal to both children and adults alike, becoming an instant favorite in any household.
One of the most appealing aspects of this recipe is its versatility. Whether you’re preparing a lunchbox snack for your kids, a quick breakfast option, or a healthy dessert for a gathering, these rice bars fit seamlessly into any occasion. The ingredients are not only simple but also packed with health benefits, ensuring that you provide your body with wholesome nutrients while enjoying a delicious treat.
The preparation process is straightforward, requiring minimal cooking skills, which makes it accessible for novices and seasoned cooks alike. With just a few essential ingredients, you can whip up a batch of these crunchy peanut butter rice bars in no time. Let’s delve into the key components that make this recipe both nutritious and delicious, before guiding you through the steps to create your very own batch.
Understanding the Key Ingredients
Brown Rice Cereal: A Nutritious Base
The foundation of our crunchy peanut butter rice bars is brown rice cereal. This ingredient is an excellent choice for snacks, thanks to its whole grain content and fiber-rich properties. Brown rice cereal is less processed than its white counterpart, which means it retains more of its natural nutrients, making it a healthier option.
Nutritionally, brown rice cereal is rich in essential vitamins and minerals, including magnesium, B vitamins, and iron. It offers a wholesome base that supports energy levels and promotes digestive health. When compared to other cereals, brown rice cereal stands out for its lower sugar content and higher fiber, making it a smart choice for anyone looking to maintain balanced blood sugar levels and enhance satiety.
The Role of Peanut Butter: Creamy or Crunchy?
Next up is peanut butter, the star ingredient that brings both flavor and nutrition to our bars. Packed with protein and healthy fats, peanut butter is a fantastic source of energy. The protein content helps to build and repair tissues, while the healthy fats provide sustained energy, making it an ideal addition to a post-workout snack or a midday boost.
When choosing peanut butter for your recipe, you have the option of creamy or crunchy varieties. Creamy peanut butter offers a smooth texture that blends seamlessly with other ingredients, while crunchy peanut butter adds an appealing texture that enhances the overall experience of the bars. Depending on your preference, both types provide the same nutritional benefits, so feel free to choose the one that suits your taste.
Sweetening with Honey or Maple Syrup
For sweetness, this recipe incorporates honey, a natural sweetener that enhances the flavor profile of the bars while providing a boost of energy. Honey is known for its antioxidant properties and can also support immune health. Its unique flavor adds depth to the bars, creating a delightful balance with the rich taste of peanut butter.
Alternatively, for those following a vegan diet or looking for a different flavor, maple syrup serves as an excellent substitute. Maple syrup not only offers its own distinct taste but is also lower on the glycemic index compared to honey, making it a suitable choice for those who are conscious of their sugar intake.
Cocoa Powder: A Touch of Chocolate
To elevate the flavor even further, cocoa powder is introduced into the mix. This ingredient is known for its rich taste and numerous health benefits, including a high concentration of antioxidants that can help combat oxidative stress. Cocoa powder is also linked to mood enhancement, making it a delightful addition to our bars.
When selecting cocoa powder, you can opt for unsweetened varieties to keep the sugar content low or sweetened options if you prefer a more indulgent treat. This flexibility allows you to tailor the bars to your specific taste preferences.
Mini Chocolate Chips: The Perfect Finishing Touch
No rice bar would be complete without a little added sweetness from mini chocolate chips. These tiny morsels of chocolate not only provide a burst of flavor but also enhance the texture of the bars. When making your choice, consider using dark chocolate chips for a healthier option, as they contain more cocoa and less sugar compared to milk chocolate.
Adding Crunch: Chopped Nuts
Finally, adding chopped nuts to the mixture introduces an additional layer of crunch and nutritional value. Nuts are a great source of healthy fats, protein, and fiber, making them an excellent complement to the other ingredients. They contribute to heart health and can help keep you feeling full longer.
When selecting nuts, consider your dietary preferences. Almonds, walnuts, or pecans are all wonderful options that can be mixed and matched to create a unique flavor profile. If you’re looking for nut-free alternatives, seeds such as pumpkin or sunflower seeds can provide a similar crunch without the allergens.
Step-by-Step Guide to Making Crunchy Peanut Butter Rice Bars
Preparing Your Workspace
Before diving into the preparation of your crunchy peanut butter rice bars, it’s essential to prepare your workspace. This includes gathering all the necessary ingredients and tools to ensure a smooth cooking experience. You’ll need:
– A large mixing bowl
– A spatula or wooden spoon for mixing
– A measuring cup and spoons
– A baking pan (preferably 8×8 inches) lined with parchment paper for easy removal
– A microwave-safe bowl or small saucepan for melting ingredients
Detailed Instructions
Now that your workspace is organized, let’s get started on creating your crunchy peanut butter rice bars.
Step 1: Preparing the Pan
Begin by preparing your baking pan. Line it with parchment paper, allowing some overhang on the sides. This will make it easier to lift the bars out once they’ve cooled and set. Lightly spray the parchment paper with cooking spray to prevent sticking, ensuring that your bars come out perfectly without any hassle.
With the pan prepared, you are now ready to move on to the next steps in creating these delectable bars. Stay tuned for the detailed instructions on combining the ingredients and the baking process that will lead you to your very own batch of crunchy peanut butter rice bars.

Using Parchment Paper for Easy Removal
Before diving into the recipe steps, let’s talk about an essential tool that will make your life easier when preparing Crunchy Peanut Butter Rice Bars: parchment paper. Lining your baking pan with parchment paper not only helps prevent the mixture from sticking but also makes it incredibly easy to lift the bars out once they’re set. Simply place a piece of parchment paper in the pan, leaving some overhang on the sides for easy removal later. This small step will save you from the frustration of trying to coax sticky bars out of a pan, ensuring that your homemade treats maintain their shape and presentation.
Step 2: Melting Wet Ingredients
Now that your pan is prepared, it’s time to melt the wet ingredients. In a medium saucepan over low heat, combine the peanut butter, honey (or maple syrup for a vegan option), and a pinch of salt. Stir continuously to prevent burning, as the mixture can go from perfectly melted to scorched very quickly. The goal is to create a smooth, creamy consistency. If you notice that it seems too thick, consider adding a splash of water or plant-based milk to help it melt more evenly. Once everything is well combined and silky, remove it from the heat and let it cool slightly before moving on to the next step.
Key Tips for Achieving the Right Consistency
To achieve the perfect consistency, make sure to keep the heat low and stir constantly. This will ensure that the ingredients meld together without burning at the bottom. If you’re new to melting these types of ingredients, it might help to use a double boiler method. Simply set a heatproof bowl over a pot of simmering water, and combine the ingredients in the bowl. This indirect heat offers more control and reduces the risk of burning.
Step 3: Mixing in Dry Ingredients
Once your wet ingredients have cooled slightly, it’s time to mix in the dry ingredients. In a large mixing bowl, combine puffed rice cereal and any other dry add-ins you choose—such as nuts or seeds. Pour the melted peanut butter mixture over the dry ingredients and use a spatula to fold everything together gently.
Techniques for Ensuring Even Coating of the Cereal
To ensure even coating, start by pouring the wet mixture over the cereal in sections rather than all at once. This allows you to distribute the liquid more uniformly. Use a folding motion to combine the ingredients, which helps prevent the cereal from breaking apart while ensuring that every piece is coated with the delicious peanut butter mixture.
Step 4: Pressing Mixture into the Pan
Once everything is nicely mixed, transfer the mixture to your prepared baking pan. Use the back of a spatula or your hands (a little dampened with water can help prevent sticking) to press the mixture firmly into the pan. It’s crucial to compact the mixture well. If it’s not pressed down enough, your bars may crumble when sliced. Aim for an even layer that fills the corners and edges of the pan for the best results.
Step 5: Chilling the Bars
After pressing the mixture into the pan, it’s time to let it chill. Place the pan in the refrigerator for at least 1-2 hours. Chilling is a critical step as it allows the bars to set and firm up, making them easier to slice and giving them a satisfying crunch when you take a bite. The chilling process helps the ingredients bind together, resulting in a texture that’s both chewy and crispy.
Step 6: Slicing and Serving
Once the bars have set, remove them from the refrigerator. Using the overhanging parchment paper, lift the entire block out of the pan. Place on a cutting board and slice into uniform squares or rectangles. For the best presentation, use a sharp knife and wipe it clean between cuts to ensure neat edges.
Tips for Cutting Bars into Uniform Sizes for Serving
To achieve uniform sizes, first cut the block in half, then cut each half into equal parts. For example, if you’re aiming for 16 bars, first cut into 4 equal rectangles, then cut each rectangle into 4 equal pieces. This will help you avoid jagged edges and ensure that each bar is a consistent size for serving.
Nutritional Benefits of Crunchy Peanut Butter Rice Bars
These Crunchy Peanut Butter Rice Bars are not only delicious but also packed with nutritional benefits. Each serving offers a balance of healthy fats, protein, and carbohydrates.
Breakdown of Calories and Macronutrients per Serving
– Calories: Approximately 150-200 calories per bar (depending on the specific ingredients used)
– Protein: 4-6 grams
– Fat: 7-10 grams (mostly healthy fats from peanut butter)
– Carbohydrates: 15-20 grams
Advantages of Homemade Snacks Over Store-Bought Options
Making your own snacks offers several advantages. You control the ingredients, ensuring that there are no artificial preservatives, added sugars, or unhealthy fats. Additionally, homemade snacks are often fresher and can be customized to suit your taste preferences.
Discussion of How These Bars Fit into Various Dietary Lifestyles
These Crunchy Peanut Butter Rice Bars can easily fit into a variety of dietary lifestyles. They can be made gluten-free by using gluten-free puffed rice cereal and can also be adapted for vegan diets by substituting honey with maple syrup. They’re a perfect snack for anyone looking for a quick energy boost without compromising on nutrition.
Creative Variations and Customizations
One of the best parts about making your own Crunchy Peanut Butter Rice Bars is the opportunity for creative variations. Here are some ideas to inspire your next batch.
Flavor Variations
Consider adding spices or extracts to enhance flavor. A dash of cinnamon or nutmeg can add warmth and depth to the bars. Alternatively, a splash of vanilla or almond extract can elevate the taste to new heights.
Alternative Mix-Ins
Get creative with your mix-ins! Dried fruits like cranberries, apricots, or raisins can add natural sweetness and chewiness. Seeds, such as chia or sunflower seeds, can introduce a crunchy texture and additional nutrients. You can also experiment with different types of nuts for added flavor and variety.
Adjusting Sweetness Levels
If you prefer a less sweet bar, consider reducing the amount of honey or syrup. You can also balance the sweetness by adding a pinch of salt, which can enhance the overall flavor profile without making the bars overly sugary.
Storage and Shelf Life
To keep your Crunchy Peanut Butter Rice Bars fresh, store them in an airtight container at room temperature for up to a week. If you want to extend their shelf life, refrigerating them can keep them fresh for up to two weeks. For longer storage, you can freeze the bars; just wrap them individually in plastic wrap and place them in a freezer-safe bag or container. They will last for up to three months in the freezer.
Conclusion
In summary, these Crunchy Peanut Butter Rice Bars are a simple and nutritious snack that caters to various dietary lifestyles. With just a handful of ingredients and a straightforward process, you can create a delicious treat that not only satisfies your sweet tooth but also supports your healthy eating goals. Don’t hesitate to try the recipe and experiment with different flavors and mix-ins to make it your own. Embrace the joy of homemade snacks, and enjoy the satisfaction of knowing exactly what goes into your treats!


