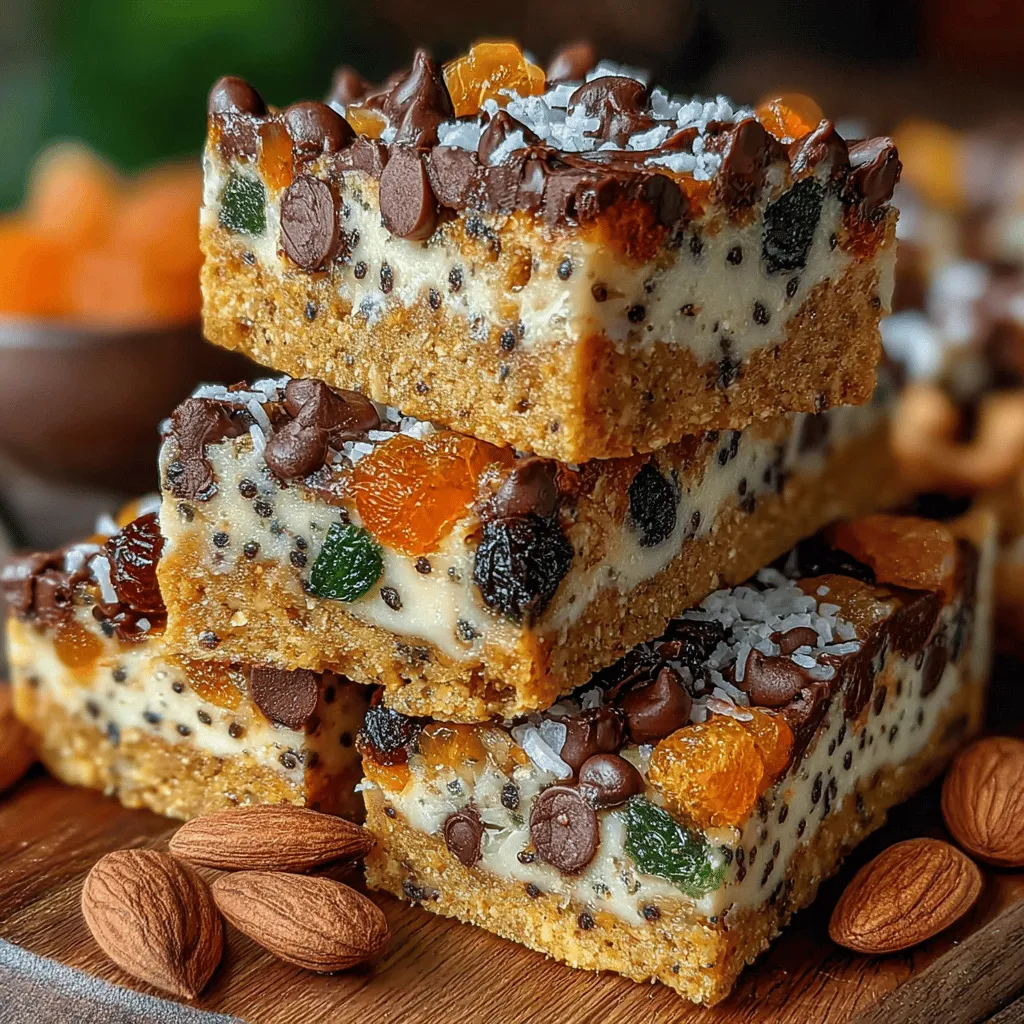
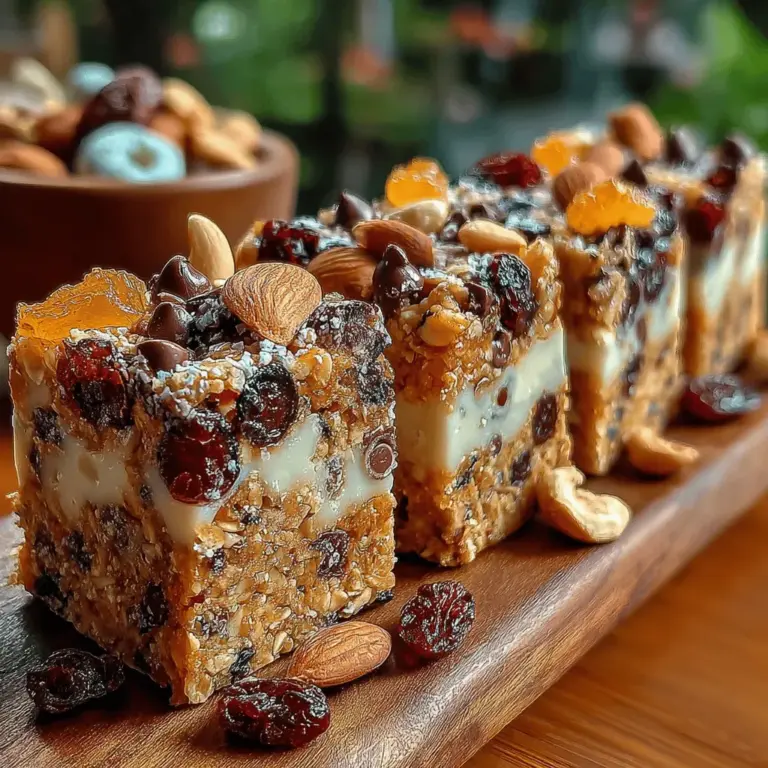
Crunchy No-Bake Trail Mix Bars: A Healthy Snack Option for Every Occasion
In recent years, the trend toward healthy snacking has surged, with more people seeking nutritious alternatives to traditional snacks that often lack essential nutrients. This shift towards wholesome eating highlights the importance of homemade snacks, as they allow individuals to control ingredients, portion sizes, and flavors. Among the myriad of healthy snack options available, Crunchy No-Bake Trail Mix Bars stand out as a delicious, easy-to-make treat that caters to both health-conscious eaters and those simply looking for a satisfying bite.
Crunchy No-Bake Trail Mix Bars are the perfect fusion of taste and nutrition. They are not only quick to prepare and require minimal effort, but they also boast a variety of wholesome ingredients that can be customized to suit personal preferences. Whether you’re preparing a snack for a busy work week, a post-workout boost, or a sweet treat for social gatherings, these bars offer a delightful combination of flavors and textures that will please everyone.
The appeal of this recipe lies in its simplicity. With just a handful of ingredients, you can whip up a batch of these energy-packed bars that are rich in fiber, healthy fats, and natural sweetness. The best part? You can tailor the bars to your liking, swapping in your favorite nuts, seeds, or dried fruits to create your ideal snack. This versatility not only makes them a go-to option for various occasions but also ensures that you can enjoy a different flavor experience each time you make them.
Understanding the Ingredients
To create the perfect Crunchy No-Bake Trail Mix Bars, it’s essential to understand the nutritional benefits of each key ingredient involved. Each component plays a vital role in not only enhancing the flavor but also contributing to the overall healthiness of the bars.
Rolled Oats: A cornerstone of this recipe, rolled oats provide a hearty base that is packed with nutrients. They are an excellent source of complex carbohydrates, which offer sustained energy throughout the day. Additionally, rolled oats are rich in dietary fiber, specifically beta-glucan, which has been shown to lower cholesterol levels and improve digestive health. Incorporating oats into your snacks can help keep you feeling fuller for longer, making them an ideal choice for a mid-afternoon pick-me-up.
Nut Butters: The choice of nut butter is crucial in achieving the right flavor and texture for your trail mix bars. Almond butter and peanut butter are popular options, each with its distinct health properties. Almond butter is rich in vitamin E, magnesium, and healthy monounsaturated fats, making it a great choice for heart health and skin nourishment. On the other hand, peanut butter is a good source of protein, niacin, and folate. Both options add creaminess to the bars and help bind the ingredients together, ensuring a satisfying chew.
Sweeteners: To enhance the natural flavors of the bars, a sweetener is often added. Honey and maple syrup are two common choices, each bringing its unique taste profile. Honey is a natural sweetener that offers antibacterial properties and antioxidants, while maple syrup provides a rich, caramel-like flavor along with essential minerals like manganese and zinc. Choosing one of these natural sweeteners not only adds sweetness but also elevates the nutritional value of your bars.
Chocolate Chips: While optional, mini chocolate chips can provide a delightful touch of indulgence to your trail mix bars. They contribute a burst of flavor and can make the bars even more appealing to those who crave a sweet treat. Using dark chocolate chips can enhance the health benefits, as dark chocolate is rich in antioxidants and may contribute to improved heart health.
Mixed Nuts: Adding a variety of mixed nuts not only enhances the crunch factor but also boosts the bars’ nutritional profile. Nuts are packed with protein, healthy fats, and various vitamins and minerals, making them a powerhouse ingredient. Common options include almonds, walnuts, cashews, and pecans, each adding unique flavors and textures. The variety of nuts also introduces different health benefits, from omega-3 fatty acids in walnuts to vitamin E in almonds.
Dried Fruits: Dried fruits serve as a natural sweetener and provide essential nutrients. They are rich in vitamins, minerals, and antioxidants, making them a great addition to your trail mix bars. Options like raisins, cranberries, apricots, and dates can enhance the bars’ sweetness while offering a chewy texture. However, it’s important to consider portion sizes, as dried fruits can be calorie-dense.
Chia/Flaxseeds: For those looking to boost the nutritional content further, adding chia or flaxseeds can be a game-changer. These seeds are considered superfoods, packed with omega-3 fatty acids, fiber, and protein. They help improve digestion and can contribute to heart health. Including them in your trail mix bars not only adds nutritional value but also contributes to a satisfying crunch.
Vanilla Extract and Salt: Finally, a splash of vanilla extract and a pinch of salt can make a world of difference in flavor. Vanilla extract enhances the overall taste profile, adding warmth and depth, while salt helps to balance the sweetness, making each bite more enjoyable.
Preparation Steps Explained
Creating Crunchy No-Bake Trail Mix Bars is a straightforward process that requires just a few simple steps. Each phase is essential to achieving the perfect texture and flavor, so let’s break down the preparation steps in detail.
Preparing the Pan: Before you begin mixing the ingredients, it’s crucial to prepare your pan. Line an 8×8-inch square baking dish with parchment paper, allowing some overhang on the sides. This will make it easier to lift the bars out once they have set. The parchment paper prevents sticking and ensures that you can cut the bars into neat squares or rectangles without any hassle.
Mixing Dry Ingredients: Start by combining the rolled oats, mixed nuts, dried fruits, and any optional ingredients like chia or flaxseeds in a large mixing bowl. Stir these dry ingredients together until they are evenly distributed. Achieving an even blend is vital, as it ensures that every bite is packed with flavor and texture. If you prefer a finer texture, you can pulse the nuts in a food processor before adding them to the mixture.
Combining Wet Ingredients: In a separate saucepan, gently warm your chosen nut butter and sweetener over low heat. This step is important, as warming the mixture helps the ingredients combine more easily, resulting in a smoother consistency. Stir the mixture until it is well combined and pour it over the dry ingredients in the mixing bowl. Use a spatula to gently fold the wet and dry ingredients together until everything is evenly coated. This process is crucial for ensuring that the bars hold together well once they are set.
As you mix, take care not to overwork the ingredients, as this can lead to a denser texture. The goal is to achieve a sticky yet cohesive mixture that will hold its shape when pressed into the pan. Once everything is thoroughly combined, you’re ready to move on to the next steps of shaping and chilling your bars, which will bring you closer to enjoying this delicious and nutritious snack.
Stay tuned for the next part of this article, where we will delve deeper into the final steps of preparing your Crunchy No-Bake Trail Mix Bars and explore some creative variations to keep your snacking experience exciting.

Merging Mixtures
To create the perfect Crunchy No-Bake Trail Mix Bars, it’s essential to ensure your mixture is sticky enough to hold together. Start by combining your dry ingredients—nuts, seeds, oats, and any add-ins like chocolate chips or dried fruit—in a large mixing bowl. In a separate bowl, prepare your wet ingredients, which typically include nut butter and a sweetener such as honey or maple syrup.
Techniques for Ensuring Stickiness:
1. Heat the Nut Butter: Gently warming your nut butter in the microwave for about 20-30 seconds can enhance its fluidity, making it easier to mix with the dry ingredients.
2. Mix Thoroughly: Use a spatula or your hands to combine the wet and dry mixtures. Make sure every piece of dry ingredient is coated with the wet mixture. If the mixture feels too dry, add a bit more nut butter or sweetener until the desired stickiness is achieved.
3. Add Moisture: If the mixture still isn’t holding together, consider adding a small amount of water or plant-based milk. However, be cautious as too much liquid can make the bars soggy.
Pressing into the Pan
Once your mixtures are well combined, the next critical step is pressing the mixture firmly into your prepared pan. This step is crucial for achieving bars that hold their shape and have a good texture.
1. Use Parchment Paper: Line your baking pan with parchment paper, allowing some overhang on the sides. This will make it easier to lift the bars out later.
2. Even Distribution: Transfer the mixture into the pan, spreading it out evenly with a spatula. To achieve a firm texture, use your hands to press the mixture down firmly. The more compact it is, the easier it will be to slice into bars later.
3. Leveling: Ensure the top is level and smooth, as this will help in achieving uniform bars once sliced.
Chilling and Setting
Chilling your trail mix bars is a vital step in the process. It allows the bars to set properly, ensuring they maintain their shape when cut and served.
1. Chill Duration: Place the pan in the refrigerator for at least 2 hours. This time allows the nut butter and sweeteners to solidify, binding the ingredients together.
2. Check for Firmness: After chilling, check if the mixture has hardened sufficiently. If it feels soft or crumbly, it may need more time in the fridge.
Slicing and Storing
Once the bars have set, it’s time to slice and store them for future snacking.
1. Cutting: Use a sharp knife to slice the bars into even squares or rectangles. For cleaner cuts, you can run the knife under hot water, then dry it before slicing.
2. Storage: Place the sliced bars in an airtight container. They can be stored in the refrigerator for up to two weeks or in the freezer for up to three months. For longer shelf life, consider wrapping each bar individually in plastic wrap or parchment paper.
Nutritional Benefits of the Bars
These Crunchy No-Bake Trail Mix Bars are not only delicious but also packed with nutrients that provide various health benefits.
Health Benefits of Each Main Ingredient
– Nuts: Rich in healthy fats, protein, and fiber, nuts can help lower cholesterol and promote heart health.
– Seeds: Ingredients like chia or flaxseeds are high in omega-3 fatty acids, essential for brain function and reducing inflammation.
– Oats: A great source of soluble fiber, oats can help regulate blood sugar levels and improve digestive health.
– Nut Butters: They provide a source of protein and healthy fats, which can keep you satiated and energized.
Macronutrient Balance
These bars offer a great balance of macronutrients:
– Carbohydrates: From oats and dried fruits, providing energy.
– Proteins: From nuts and nut butter, essential for muscle repair and growth.
– Fats: From nuts and seeds, supporting brain health and hormone production.
Dietary Fit
Depending on the ingredients used, these bars can easily fit into various dietary plans:
– Gluten-Free: Use gluten-free oats to ensure they are safe for those with gluten sensitivities.
– Vegan: Substitute honey with maple syrup or agave nectar for a fully plant-based option.
Customization Options
One of the best aspects of these Crunchy No-Bake Trail Mix Bars is their versatility. You can easily tailor the recipe to suit your taste preferences or dietary needs.
Ingredient Substitutions
– Nut Butters: While almond and peanut butter are popular choices, consider using sunflower seed butter for a nut-free alternative or cashew butter for a milder flavor.
– Nuts and Dried Fruits: Feel free to mix and match. Use walnuts, pecans, or even pumpkin seeds. Swap raisins for cranberries or apricots for a different flavor profile.
– Sweeteners: Experiment with different natural sweeteners. Brown rice syrup or coconut nectar can also be great alternatives to honey or maple syrup.
– Add-Ins: Consider adding chia seeds, hemp seeds, or even a scoop of protein powder to boost the nutritional content of your bars. Spices like cinnamon or vanilla extract can enhance the flavor profile.
Serving Suggestions and Pairing Ideas
These trail mix bars are perfect for snacking on the go, but there are countless ways to enjoy them.
Creative Serving Ideas
– Breakfast Bars: Crumble a bar over yogurt or oatmeal for a nutritious breakfast.
– Energy Boost: Pair a bar with a smoothie for a post-workout snack or mid-afternoon energy boost.
– Dessert Alternative: Serve with a cup of tea or coffee as a healthier dessert option.
Pairing with Beverages
– Smoothies: Blend your favorite fruits and greens with a splash of almond milk for a refreshing drink that complements the bars.
– Tea or Coffee: The crunchy texture and nutty flavor of the bars pair well with herbal teas or a strong cup of coffee.
Conclusion
The Crunchy No-Bake Trail Mix Bars are a testament to the ease and versatility of creating healthy snacks at home. With their delightful mix of textures and flavors, these bars not only satisfy your cravings but also provide essential nutrients to fuel your day. Whether you stick to the original recipe or incorporate your unique twists, these bars are sure to become a staple in your kitchen. Try out the recipe today, and don’t hesitate to explore various combinations that suit your individual tastes and dietary preferences. Enjoy the journey of making these delicious and nutritious snacks!


