Chilled Strawberry Dream Cheesecake Cups: A Refreshing Dessert Delight
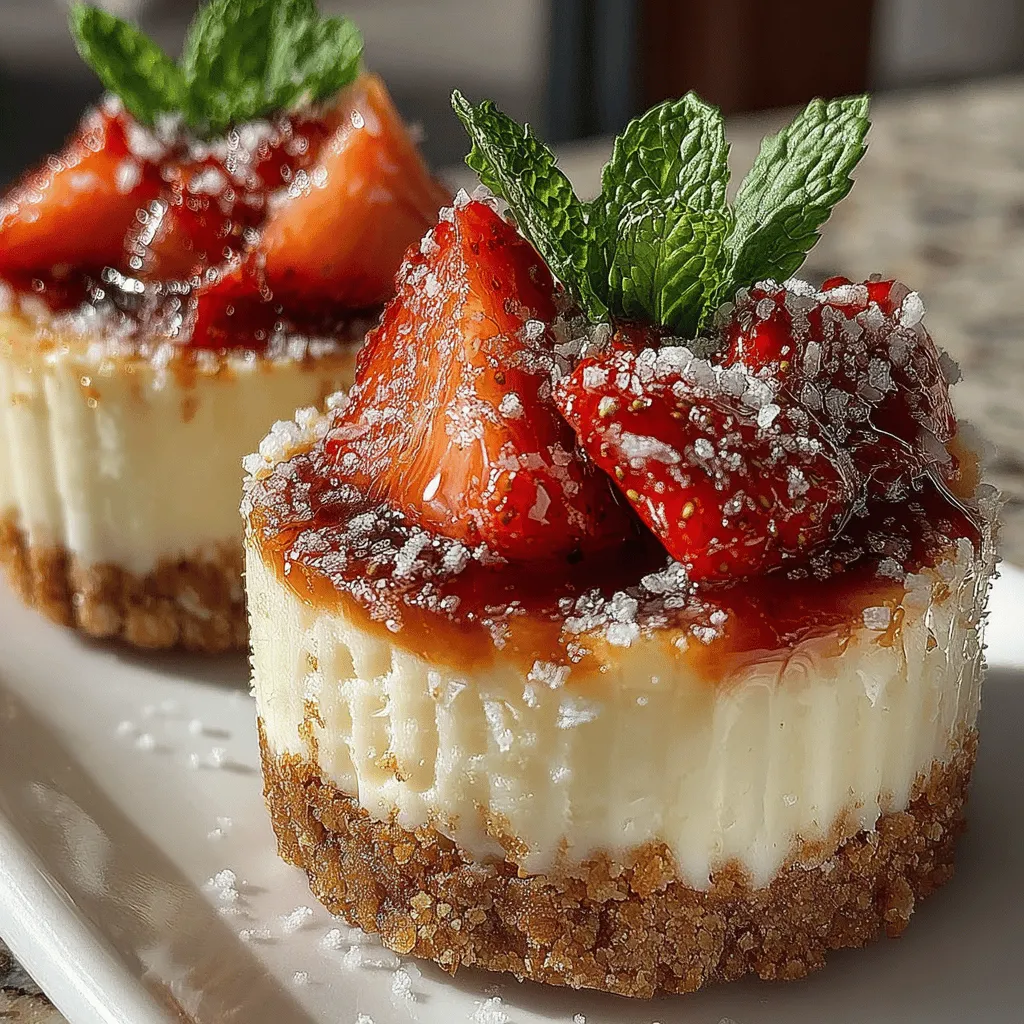
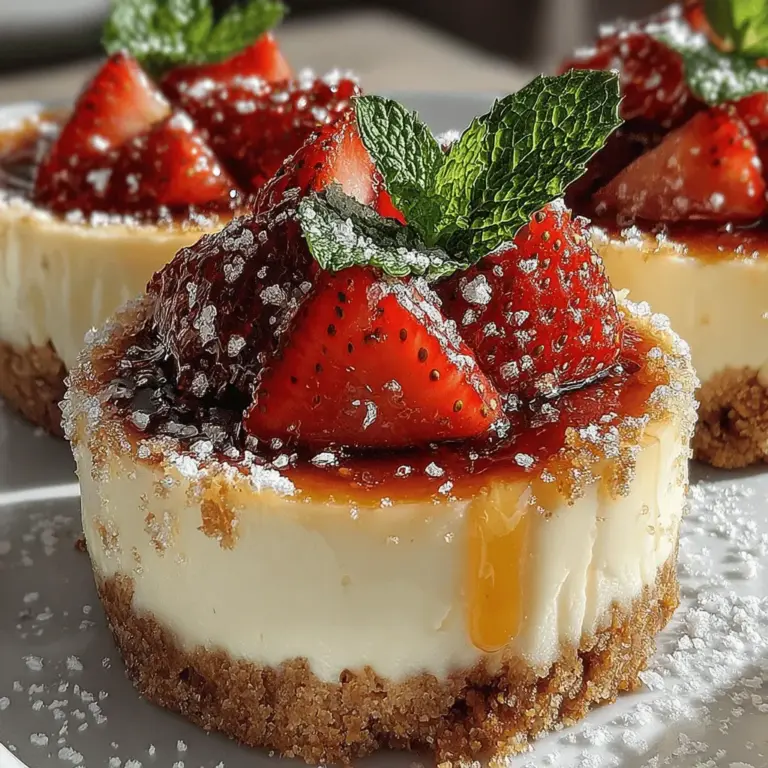
Indulging in a dessert that is both refreshing and satisfying is a true delight, especially during the warmer months. Chilled Strawberry Dream Cheesecake Cups are the perfect combination of creamy cheesecake and vibrant strawberries, all nestled in a crumbly graham cracker crust. This delightful treat not only offers a burst of flavors but also presents beautifully, making it ideal for gatherings, picnics, or simply enjoying at home. In this article, we will guide you through the steps to create these delectable cheesecake cups, ensuring a delicious outcome that can be enjoyed by family and friends alike. With a focus on the simplicity of preparation and the joy of presentation, you’ll discover that these cheesecake cups are not only aesthetically pleasing but also bursting with flavor.
The Allure of Chilled Strawberry Dream Cheesecake Cups
The appeal of cheesecake cups lies in their versatility and elegance. Unlike traditional cheesecakes, which can be cumbersome to slice and serve, cheesecake cups present an individual serving option that is perfect for sharing. Each cup encapsulates the creamy texture of cheesecake, making it easy to enjoy without the need for utensils or the mess that can come with traditional slices.
The freshness of strawberries is another key component that elevates this dessert. Strawberries not only add vibrant color but also provide a natural sweetness that balances the richness of the cheesecake filling. The bright, tangy flavor of strawberries complements the creamy base, creating a harmonious blend that tantalizes the taste buds. This balance of flavors and textures is what makes Chilled Strawberry Dream Cheesecake Cups a standout choice for any dessert table.
Ingredients Overview
Before diving into the preparation, let’s take a closer look at the components that make up these delightful cheesecake cups.
1. The Crust: The foundation of any great cheesecake is its crust. For our Chilled Strawberry Dream Cheesecake Cups, we will use graham cracker crumbs combined with a bit of sugar and melted butter. This mixture creates a sweet and crunchy base that perfectly contrasts the smooth cheesecake filling.
2. The Cheesecake Filling: The heart of the dessert, the cheesecake filling is made from cream cheese, powdered sugar, vanilla extract, and heavy cream. Each ingredient plays a crucial role: the cream cheese provides the rich and creamy texture, while the powdered sugar adds sweetness. The vanilla extract enhances the flavor profile, and the heavy cream is whipped to airy perfection, ensuring a light and fluffy filling.
3. The Strawberry Topping: To crown our cheesecake cups, we’ll prepare a fresh strawberry topping. This can be as simple as sliced strawberries or a quick strawberry sauce, depending on your preference. The topping not only adds flavor but also serves as a visual appeal, making the cups irresistible.
Preparing the Crust
Creating the perfect graham cracker crust is straightforward and sets the stage for a delicious dessert. Here’s a step-by-step guide to help you achieve that ideal crust for your cheesecake cups.
1. Gather Your Ingredients: Start by gathering the necessary ingredients for the crust. You’ll need graham cracker crumbs, granulated sugar, and unsalted butter. The ratio of these ingredients is crucial, so measuring them accurately will yield the best results.
2. Combine the Ingredients: In a mixing bowl, combine the graham cracker crumbs with granulated sugar. The sugar not only adds sweetness but also helps bind the crumbs together. Mix these dry ingredients until they are well combined.
3. Melt the Butter: In a microwave-safe bowl or on the stovetop, melt the unsalted butter until it is completely liquid. Allow it to cool slightly before using to avoid cooking the crumbs.
4. Mix the Crust: Gradually add the melted butter to the graham cracker mixture, stirring until the crumbs are evenly coated. The mixture should resemble wet sand and hold together when pressed.
5. Press into Cups: To create individual servings, use a tablespoon or your fingers to press the crumb mixture firmly into the bottom of each serving cup. Ensure that the crust is compact and even, as this will provide a sturdy base for the cheesecake filling. If you prefer a thicker crust, feel free to add more crumbs and butter to achieve the desired thickness.
6. Chill the Crust: Once you’ve formed the crust in each cup, place them in the refrigerator for at least 15 minutes. This chilling step helps the crust set and firm up, making it easier to fill with the cheesecake mixture later.
Crafting the Cheesecake Filling
Now that the crust is prepared and chilled, it’s time to focus on crafting the cheesecake filling. This is where the magic happens, transforming your ingredients into a creamy, dreamy filling.
1. Soften the Cream Cheese: Start with room temperature cream cheese, which will make mixing easier and yield a smoother filling. If you forget to take it out ahead of time, you can microwave it for a few seconds to soften it.
2. Mix the Cream Cheese: In a mixing bowl, beat the softened cream cheese with an electric mixer until it becomes smooth and creamy. Scraping down the sides of the bowl ensures that all the cream cheese is incorporated.
3. Add Sweetness: Gradually add the powdered sugar to the cream cheese, mixing on low speed until combined. Increase the speed to medium to incorporate air into the mixture, creating a light texture.
4. Enhance with Vanilla: Add the vanilla extract to the mixture, blending it in until fully combined. The vanilla adds depth and a warm flavor to the cheesecake filling.
5. Whip the Heavy Cream: In a separate bowl, whip the heavy cream until stiff peaks form. This step is crucial, as it will give the filling a light and airy texture. Be careful not to over-whip, as this can lead to a grainy texture.
6. Fold the Two Mixtures: Gently fold the whipped cream into the cream cheese mixture using a spatula. The folding technique is important to maintain the airiness of the whipped cream, which gives the cheesecake its signature lightness.
With these initial steps complete, you’re well on your way to creating your Chilled Strawberry Dream Cheesecake Cups. The next sections will guide you through adding the strawberry topping and assembling these delightful desserts, ensuring that each cup is a perfect blend of flavor and presentation. Stay tuned for the continuation of this delicious journey!

Assembling the Cheesecake Cups
Layering the Cheesecake Filling Over the Crust
Once your crust has set, it’s time to layer on the luscious cheesecake filling. Start by taking your prepared filling, which should be creamy and smooth. Using a spatula or a spoon, carefully dollop a generous amount of the cheesecake mixture into each cup over the crust. Aim to fill each cup about three-quarters full, leaving just enough space for the strawberry topping that will come later.
When layering, it’s critical to distribute the filling evenly across all cups to ensure a consistent taste and texture in each serving. If you want to achieve a professional finish, you can use a piping bag fitted with a large round tip to pipe the filling into the cups. This method not only looks elegant, but it also helps to avoid any spills or mess during the assembly.
Smoothing the Surface for a Professional Finish
To achieve that beautiful, smooth surface, gently tap the cups on the counter a couple of times. This will help the filling settle into any gaps and eliminate air bubbles. After that, you can use an offset spatula or the back of a spoon to carefully smooth the tops of each cup. This step is essential for creating a polished look, especially if you plan to serve them at a special event.
Understanding the Importance of Chilling the Cups for Best Results
Once your cheesecake filling is perfectly layered and smoothed, cover each cup with plastic wrap or aluminum foil. This will prevent any odors from affecting the flavor of your cheesecake. Place the cups in the refrigerator for at least 4 hours, but ideally overnight. Chilling allows the flavors to meld beautifully and the filling to set properly, making it easier to add the strawberry topping later.
Preparing the Strawberry Topping
Selecting the Freshest Strawberries for Optimal Flavor
The success of your strawberry topping hinges on the quality of the strawberries you choose. Look for ripe, firm strawberries that are bright red with a natural sheen. Avoid any that show signs of bruising or mold. If possible, purchase your strawberries from a local farmer’s market or a trusted grocery store that prioritizes freshness. The better the strawberries, the more flavorful your topping will be.
The Role of Sugar and Lemon Juice in Enhancing the Strawberries
Once you have your strawberries, rinse them gently under cool water and pat them dry with a paper towel. Remove the green tops and slice them into thin pieces. In a mixing bowl, combine the sliced strawberries with a couple of tablespoons of sugar and a squeeze of fresh lemon juice. The sugar will help draw out the natural juices from the strawberries, creating a delicious syrup, while the lemon juice enhances the overall flavor by adding a hint of acidity.
Allowing the Strawberries to Macerate for the Perfect Topping
After mixing, let the strawberries sit at room temperature for about 15-30 minutes. This process, known as maceration, allows the sugar to dissolve and the strawberries to release their juices. The result is a sweet, syrupy mixture that will complement the creamy cheesecake beautifully. If you prefer a chunkier topping, you can skip the maceration step and simply layer the fresh strawberries on top of the cheesecake filling.
Final Assembly and Chilling
Layering the Strawberry Topping on the Cheesecake Filling
Once the cheesecake has set and the strawberries have macerated, it’s time for the final assembly. Carefully spoon the macerated strawberries over the cheesecake filling in each cup. Make sure to distribute the strawberries evenly, allowing some of the syrup to drizzle over the cheesecake for added flavor and visual appeal.
The Significance of Chilling Time for Flavor Development
After the strawberry topping has been added, cover the cups with plastic wrap again and return them to the refrigerator for an additional 1-2 hours. This chilling time is essential for the flavors to meld together and for the cheesecake to firm up even more. The longer you chill, the better the flavors will develop, making for a more delicious treat.
Visual Appeal in Presentation and Garnishing Options
When you’re ready to serve your Chilled Strawberry Dream Cheesecake Cups, consider adding a final touch for visual appeal. A sprig of fresh mint or a dusting of powdered sugar can elevate the presentation. Additionally, you might consider drizzling a little extra strawberry syrup or a spoonful of whipped cream on top for an extra indulgent touch. The key is to make each cup look as good as it tastes!
Serving Suggestions
Best Practices for Serving Chilled Cheesecake Cups
When it’s time to serve your cheesecake cups, present them straight from the refrigerator for the best taste and texture. Using a small spoon or dessert fork, guests can easily dig into the layers of crust, cheesecake, and strawberries. This layered presentation not only looks appealing but also allows each bite to combine all the flavors harmoniously.
Pairing Options That Complement the Dessert
Consider serving the cheesecake cups alongside a light beverage to balance the richness of the dessert. A refreshing iced tea, sparkling water with lemon, or a glass of sweet white wine can complement the flavors beautifully. You might also serve them with a side of fresh fruit or a small salad to create a more rounded meal.
Ideas for Garnishing with Mint or Other Herbs
To add a fresh touch to your cheesecake cups, garnish each one with a sprig of mint. This not only enhances the presentation but also adds a refreshing aroma as you take a bite. Alternatively, consider using edible flowers such as pansies or nasturtiums for a stunning and colorful garnish. These little touches can transform your dessert into a stunning centerpiece on your table.
Nutritional Information
Breaking Down the Nutritional Aspects of the Dessert
For those mindful of their dietary intake, understanding the nutritional information of your Chilled Strawberry Dream Cheesecake Cups is essential. Each serving typically contains around 250-300 calories, depending on the specific ingredients used and portion sizes.
Understanding Serving Sizes and Calorie Content
When serving, aim for a standard serving size of about 3-4 ounces per cup. This portion size allows you to enjoy the dessert without overindulging, making it suitable for gatherings or family dinners. If you’re looking to reduce calorie content, consider using low-fat cream cheese or Greek yogurt in place of traditional cream cheese.
Highlighting Any Potential Dietary Considerations
This recipe can easily be adapted for various dietary needs. For gluten-free guests, simply ensure your crust is made from gluten-free cookies or nuts. To make the dessert vegan, substitute dairy ingredients with plant-based alternatives, such as cashew cream or vegan cream cheese. These substitutions will allow you to cater to a diverse range of dietary preferences while still enjoying a delightful dessert.
Conclusion
Chilled Strawberry Dream Cheesecake Cups offer a delightful way to enjoy a classic dessert with a fresh twist. This no-bake recipe combines the richness of cheesecake with the natural sweetness of strawberries, providing a perfect treat for any occasion. By following the outlined steps, you can create a visually stunning and delicious dessert that is sure to impress. Whether it’s a summer gathering or a family dinner, these cheesecake cups will surely become a favorite, leaving everyone craving more. Enjoy the refreshing flavors and the joy they bring to your table!


