Caramelized Apple Cinnamon Cheesecake Bars: A Flavorful Introduction
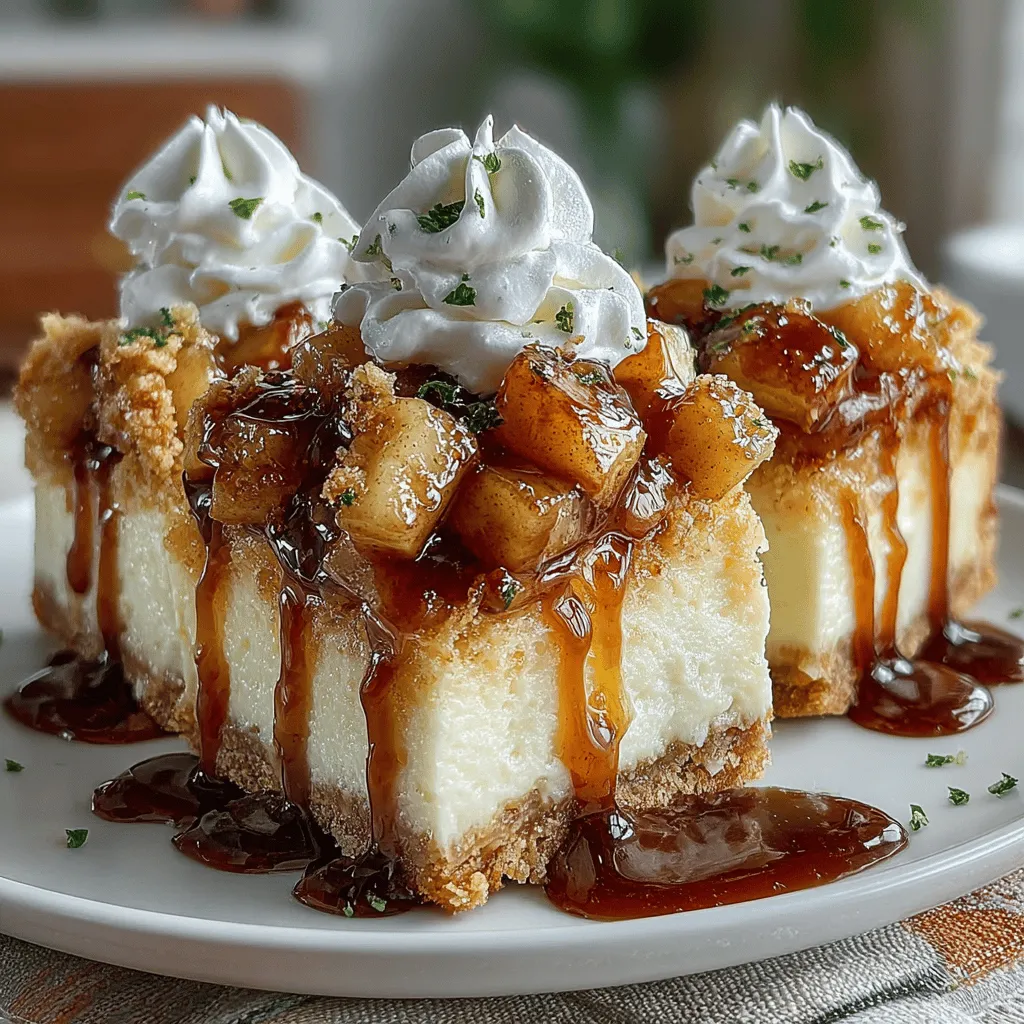
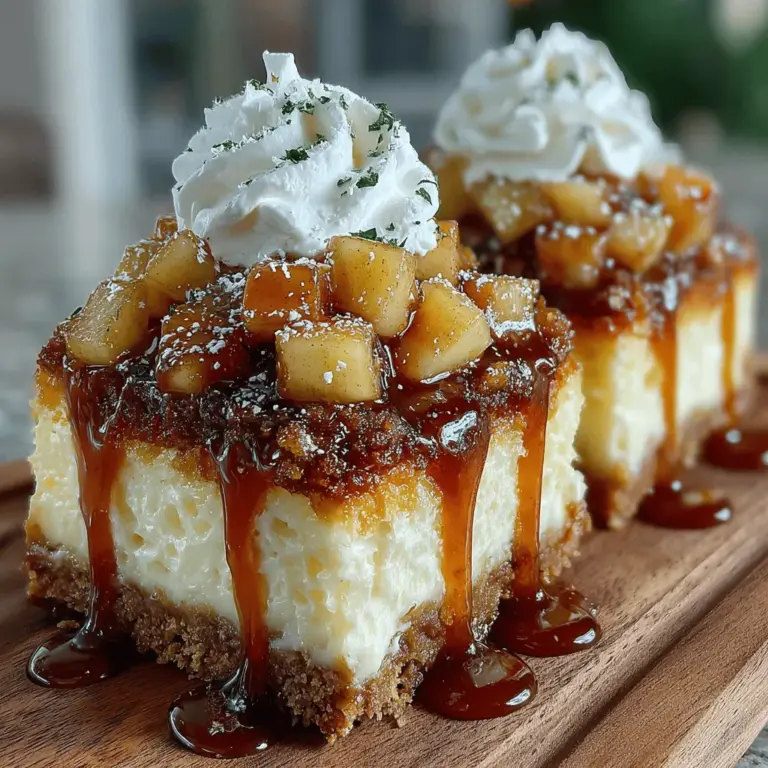
If you’re searching for a dessert that beautifully marries the warmth of autumn spices with the creamy richness of cheesecake, look no further than caramelized apple cinnamon cheesecake bars. These delightful treats not only capture the essence of fall with their comforting flavors, but they also provide a stunning visual appeal that makes them perfect for gatherings, family dinners, or simply enjoying a cozy night in. The harmonious blend of caramelized apples, a hint of cinnamon, and the velvety texture of cheesecake creates a dessert experience that is sure to impress.
One of the most compelling aspects of this recipe is its reliance on seasonal ingredients. Fresh apples, fragrant cinnamon, and rich cream cheese come together to elevate the dish, making it a celebration of flavors that are at their peak during the autumn months. Using seasonal produce enhances not only the taste but also the overall experience of the dessert. This is a dish that invites you to slow down and savor each bite, allowing the combination of flavors to transport you to a cozy kitchen filled with the scents of baking and warmth.
Understanding the Key Ingredients
To create the perfect caramelized apple cinnamon cheesecake bars, it’s essential to understand the role of each ingredient in the recipe. The four primary components that contribute to the success of this dessert are the graham cracker crumbs for the crust, cream cheese for the cheesecake filling, fresh apples for the caramelized topping, and a blend of spices to tie everything together.
Graham Cracker Crumbs: The foundation of any cheesecake bar is its crust, and in this recipe, graham cracker crumbs are used to create a crunchy, slightly sweet base. The unique flavor of graham crackers complements the richness of the cheesecake, while their texture provides the perfect contrast to the smooth filling. When combined with melted butter, the crumbs bind together to form a crust that not only holds its shape but also adds a delightful crunch to each bite.
Cream Cheese: As the star ingredient in the cheesecake filling, cream cheese provides the rich, creamy texture that defines this dessert. Its tangy flavor balances the sweetness of the caramelized apples and the richness of the crust, creating a harmonious blend of tastes. When whipped to perfection, cream cheese offers a smooth consistency that is essential for achieving the ideal cheesecake texture.
Fresh Apples: The filling of these cheesecake bars wouldn’t be complete without fresh apples, which are caramelized to enhance their natural sweetness and add depth to the flavor profile. Choosing the right variety of apples is crucial; varieties like Granny Smith or Honeycrisp offer a perfect balance of sweetness and tartness, ensuring that the filling is both flavorful and refreshing. The process of caramelization transforms the apples, creating a luscious topping that contrasts beautifully with the creamy cheesecake layer.
Cinnamon and Sugar: A touch of cinnamon adds warmth and spice to the dessert, perfectly complementing the caramelized apples. The balance of flavors is further enhanced by the addition of brown sugar, which brings a rich sweetness and slight molasses undertone that elevates the overall taste. A hint of lemon juice can also be added to the filling to balance the sweetness, providing a subtle acidity that brightens the flavors.
Preparing the Crust
Now that we understand the importance of each ingredient, let’s delve into the process of preparing the crust for these caramelized apple cinnamon cheesecake bars. A well-made crust sets the foundation for the entire dessert, so it’s essential to get it just right.
Begin by preheating your oven to 350°F (175°C). This temperature is ideal for achieving a perfectly baked crust that is golden brown and fragrant.
In a mixing bowl, combine 1 ½ cups of graham cracker crumbs with ½ cup of granulated sugar and ½ cup of melted butter. The melted butter acts as a binding agent, ensuring that the crumbs stick together as they bake. When mixing, make sure the crumbs are evenly coated with butter; this will help you achieve a cohesive crust that holds its shape once baked.
For the perfect texture, it’s important to use fine graham cracker crumbs. If you find yourself with larger pieces, pulse them in a food processor until they reach a fine consistency. This ensures that your crust will be smooth and even, providing a delightful crunch with every bite.
Once the crust mixture is ready, pour it into a greased 9×13-inch baking pan. Use the back of a measuring cup or your hands to press the mixture firmly into the bottom of the pan, ensuring an even layer. This step is crucial as it prevents the crust from crumbling apart later on.
Bake the crust in the preheated oven for about 8-10 minutes, or until it becomes lightly golden. Keep a close eye on it during this time, as over-baking can lead to a dry crust. Once baked, remove the crust from the oven and allow it to cool slightly while you prepare the apple filling.
Creating the Apple Filling
With the crust cooling, it’s time to turn our attention to the star of the show: the caramelized apple filling. This step is where the magic happens, transforming fresh apples into a luscious topping that will complement the creamy cheesecake layer perfectly.
Start by selecting your apples. As mentioned earlier, varieties like Granny Smith or Honeycrisp offer the best combination of sweetness and tartness. For this recipe, you will need about four medium apples, peeled, cored, and diced into bite-sized pieces.
In a large skillet over medium heat, melt 2 tablespoons of butter. Once the butter is melted and bubbling, add the diced apples along with ½ cup of brown sugar and 1 teaspoon of ground cinnamon. Stir the mixture to coat the apples evenly with the sugar and cinnamon, allowing the flavors to meld together.
As the apples cook, they will begin to release their juices, creating a sweet syrup that will coat the fruit. Continue to sauté the apples for about 8-10 minutes, or until they become tender and start to caramelize. The key to achieving the perfect caramelization is patience; allow the apples to cook undisturbed for a minute or two at a time to let them develop a beautiful golden color.
To enhance the flavor balance, squeeze in the juice of half a lemon. This addition not only brightens the filling but also cuts through the sweetness, ensuring the final product is well-rounded and delicious. Once the apples are caramelized, remove the skillet from the heat and allow the filling to cool slightly before layering it over the cheesecake mixture.
Crafting the Cheesecake Layer
With the crust and apple filling prepared, the final step before assembly is crafting the cheesecake layer. This layer is what ties everything together, providing a smooth and creamy contrast to the crunchy crust and the sweet, caramelized apples.
In a large mixing bowl, beat 16 ounces of softened cream cheese until it is smooth and creamy. This step is crucial for achieving a homogeneous cheesecake mixture without lumps. Once the cream cheese is silky, add 1 cup of granulated sugar, 2 large eggs, and 1 teaspoon of vanilla extract. Beat the mixture on medium speed until well combined and creamy, ensuring that everything is thoroughly incorporated.
For an extra touch of flavor, you may choose to add a pinch of salt and a sprinkle of cinnamon to the cheesecake mixture. This will enhance the overall taste, creating a more complex flavor profile that complements the other components of the dessert.
Once the cheesecake layer is ready, it’s time to assemble the bars. Pour the cream cheese mixture over the cooled crust, smoothing it out evenly with a spatula. Then, gently spoon the caramelized apple filling over the cheesecake layer, distributing it evenly for a beautiful presentation.
Now that the bars are assembled, they are ready for the oven. Bake at 350°F (175°C) for about 30-35 minutes, or until the cheesecake is set and slightly jiggly in the center. The edges should be firm, while the center will continue to firm up as it cools.
As the cheesecake bars bake, the kitchen will fill with the enticing aroma of caramelized apples and cinnamon, creating an atmosphere of comfort and anticipation that will have everyone eager to dig in once they are ready.

Importance of Room Temperature Cream Cheese for Easy Mixing
When preparing the filling for your Caramelized Apple Cinnamon Cheesecake Bars, ensuring that your cream cheese is at room temperature is a crucial step. Cold cream cheese can result in a lumpy filling that doesn’t blend well with the other ingredients. To bring your cream cheese to room temperature, simply remove it from the refrigerator about 30 minutes before you start mixing. This will allow the cream cheese to soften, leading to a smoother texture and a more cohesive filling.
Techniques for Incorporating Eggs Without Overmixing
Incorporating eggs into your cheesecake mixture requires a delicate touch. Overmixing can lead to a dense and overly airy texture, which is not ideal for cheesecake bars. To incorporate the eggs effectively, add one egg at a time to the cream cheese mixture, mixing on low speed until just combined. Scrape down the sides of the bowl between additions to ensure an even mix. This technique will help maintain the creamy consistency while preventing excess air from being trapped in the filling.
Discussion on the Flavor Profile Enhanced by Vanilla and Cinnamon
The flavor profile of these cheesecake bars is elevated by the warm, comforting notes of vanilla and cinnamon. Vanilla extract adds a rich depth to the cream cheese filling, while cinnamon complements the caramelized apples, enhancing their natural sweetness. The combination creates a harmonious balance that delights the palate, making each bite of cheesecake bar a delightful experience. The interplay of flavors is vital in ensuring that the cheesecake is not only creamy but also infused with a warm, inviting taste that captures the essence of fall.
Assembling the Cheesecake Bars
Layering the Crust, Apple Filling, and Cheesecake Mixture
Now it’s time to assemble your Caramelized Apple Cinnamon Cheesecake Bars. Start by preheating your oven to 325°F (160°C). Prepare an 8×8-inch baking dish by lining it with parchment paper, leaving enough overhang to easily lift the bars out once baked.
1. Crust Layer: Begin by pressing the prepared graham cracker crust mixture firmly into the bottom of the lined baking dish. Use the back of a measuring cup or your fingers to ensure an even layer. Bake the crust for about 10 minutes until lightly golden, then remove it from the oven and let it cool slightly.
2. Apple Filling: While the crust cools, prepare the caramelized apple filling. Spread the apple mixture evenly over the crust, distributing it well to ensure every bite has a taste of the sweet, cinnamon-laced apples.
3. Cheesecake Mixture: Carefully pour the cheesecake filling over the apple layer. Use a spatula to gently spread it across the apples without disturbing them too much.
Tips for Achieving a Marbled Effect with the Apple Mixture
For a beautiful marbled effect, take a spoon and dollop some of the remaining apple filling on top of the cheesecake mixture. Using a knife or a skewer, gently swirl the apple filling into the cheesecake layer without fully mixing them together. This technique not only enhances the visual appeal of your bars but also creates a delightful mix of flavors in each slice.
Importance of Layering for Both Flavor and Presentation
Layering is key in this recipe, as it ensures that each bite offers a perfect combination of crust, apple filling, and cheesecake. Proper layering also enhances the presentation, showcasing the beautiful contrast between the creamy cheesecake and the caramelized apples. This attention to detail transforms a simple dessert into an impressive treat that is sure to delight your guests.
Baking Process
Guidelines on the Baking Time and Temperature
Once assembled, bake the cheesecake bars in the preheated oven for 45-50 minutes. You will know they are ready when the edges are set, but the center still has a slight jiggle. This gentle baking process ensures that the cheesecake cooks evenly without becoming dry.
Explanation of the Importance of Gentle Baking for Cheesecake Bars
Gentle baking is essential for achieving the creamy texture characteristic of cheesecake. High temperatures can cause the cheesecake to set too quickly, leading to cracks and a dry texture. By baking at a moderate temperature, you allow the filling to cook evenly while retaining its rich, creamy consistency.
Cooling Techniques to Prevent Cracking and Ensure a Smooth Finish
After baking, turn off the oven and crack the oven door. Let the cheesecake bars cool in the oven for about an hour. This gradual cooling helps prevent sudden temperature changes that can lead to cracking. Once cooled, transfer the baking dish to the refrigerator and chill for at least four hours, or preferably overnight. Chilling not only helps the bars firm up but also allows the flavors to meld beautifully.
Chilling and Serving
Importance of Chilling for Texture and Flavor Development
Chilling your cheesecake bars is a crucial step that enhances their texture and flavor. The cold temperature allows the cheesecake to firm up properly, making it easier to slice. It also gives the flavors time to develop, resulting in a more delicious dessert.
Tips for Cutting and Serving the Bars
When it’s time to cut your cheesecake bars, use a sharp knife dipped in warm water for clean slices. Wipe the knife clean between cuts to maintain neat edges. This technique will help you achieve beautiful, uniform squares that will impress your guests.
For serving, place the bars on a platter and consider drizzling them with caramel sauce or topping them with a dollop of whipped cream for added indulgence. Fresh whipped cream can be made quickly by whipping heavy cream with a little sugar and vanilla until soft peaks form.
Discuss Optional Toppings Like Caramel Sauce and Whipped Cream
While the cheesecake bars are delicious on their own, you can elevate them further with toppings. A drizzle of warm caramel sauce adds an extra layer of sweetness, while whipped cream provides a light, airy contrast to the rich cheesecake. For a more festive touch, consider sprinkling chopped nuts or a dash of cinnamon on top before serving.
Nutritional Information
Overview of Nutritional Aspects of the Bars
These Caramelized Apple Cinnamon Cheesecake Bars offer a delightful treat with a balance of flavors and textures. Each bar is rich in healthy fats from the cream cheese and contains fresh apples, providing dietary fiber and essential vitamins. However, they are also a dessert, so moderation is key.
Key Ingredients and Their Health Benefits
– Cream Cheese: A source of calcium and protein, cream cheese also adds a creamy texture to the bars.
– Apples: Packed with dietary fiber, apples promote digestive health and provide essential vitamins, including vitamin C.
– Cinnamon: Known for its antioxidant properties, cinnamon can help regulate blood sugar levels and add a warm flavor to the bars.
Suggestions for Ingredient Substitutions for Dietary Preferences
For those with dietary restrictions, consider these substitutions:
– Gluten-Free Option: Use gluten-free graham crackers or almond flour for the crust.
– Dairy-Free Option: Substitute cream cheese with a dairy-free cream cheese alternative and use coconut cream for a rich texture.
– Sugar-Free Option: Use a sugar substitute like erythritol or stevia in place of granulated sugar to reduce the overall sugar content.
Conclusion
The Caramelized Apple Cinnamon Cheesecake Bars are a unique twist on a classic dessert, combining the creamy richness of cheesecake with the warm flavors of caramelized apples and cinnamon. These bars are not only visually appealing but also a delightful treat that can be enjoyed by all.
Baking these cheesecake bars offers a wonderful opportunity to indulge in the joy of creating something special. Whether you’re making them for a holiday gathering, a family dinner, or simply to enjoy at home, they are sure to bring comfort and delight to your kitchen.
So roll up your sleeves, gather your ingredients, and immerse yourself in the baking process. You will not only create a delicious dessert but also memories that will last a lifetime. Enjoy every step of the way, and happy baking!


