Introduction
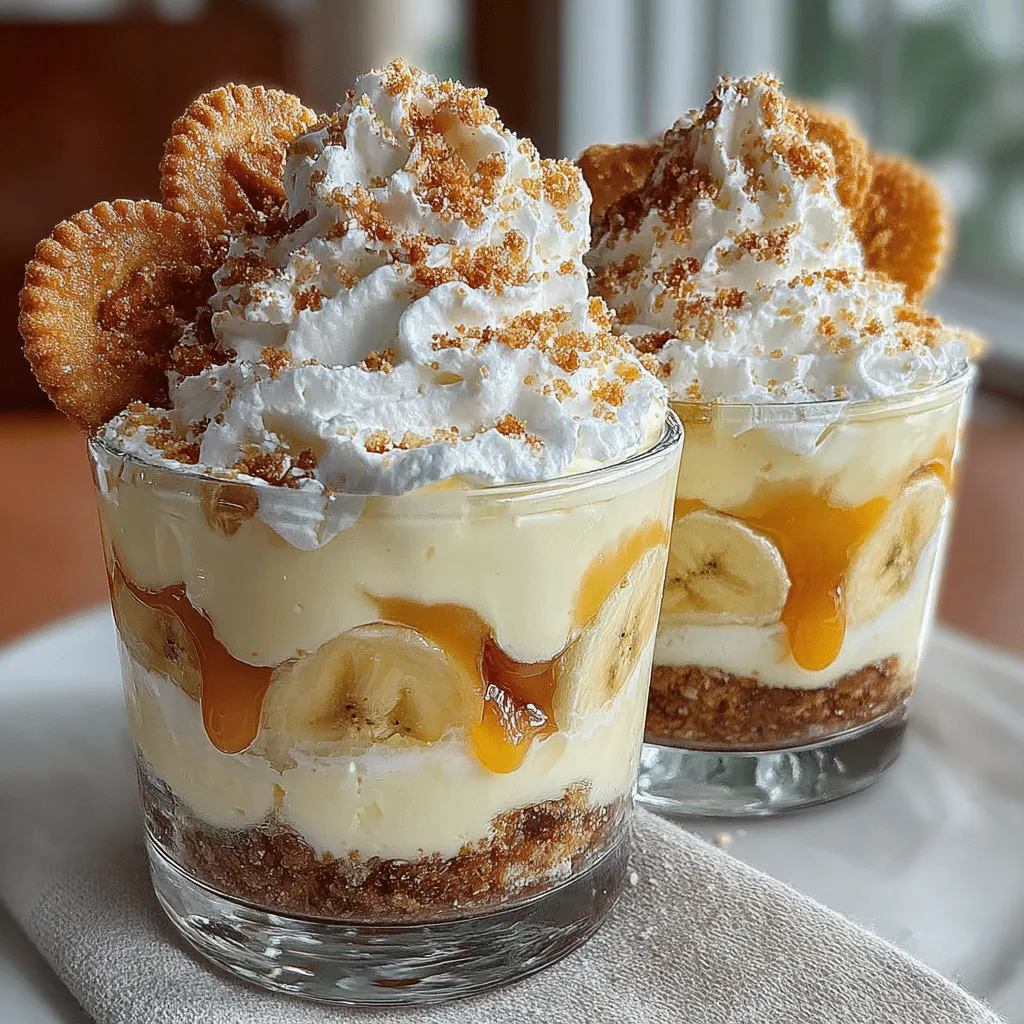
Discover the joy of creating a simple yet indulgent dessert with our No-Bake Banana Bliss Pudding Cups. Perfect for gatherings, potlucks, or a sweet treat at home, this recipe combines the creamy goodness of vanilla pudding with the rich flavor of ripe bananas and light, airy whipped cream. With no baking involved, these pudding cups are a quick and delightful way to satisfy your sweet tooth while impressing your guests.
No-bake desserts have surged in popularity, and it’s easy to see why. They offer a range of benefits that make them a go-to choice for both novice and seasoned cooks. The appeal of no-bake desserts lies not only in their simplicity but also in their versatility. Whether you’re preparing for a family dinner, a picnic, or a last-minute gathering, these desserts can be whipped up in no time, allowing you to focus on enjoying the occasion rather than stressing over complicated recipes.
Understanding the Appeal of No-Bake Desserts
No-bake desserts stand out in the culinary world for several compelling reasons:
– Time-Saving Benefits: One of the most attractive features of no-bake desserts is their efficiency. With minimal preparation time and no need for an oven, you can have a delicious treat ready in a fraction of the time it takes to bake. This is especially beneficial for busy individuals or families who want to enjoy a homemade dessert without the lengthy process.
– Easy Cleanup and Minimal Kitchen Mess: The simplicity of no-bake desserts translates to easier cleanup. Without the need for baking dishes, measuring cups, and mixing bowls that often require scrubbing, you’ll find that your kitchen remains tidy. This is particularly advantageous when hosting guests, allowing you to spend less time cleaning and more time enjoying their company.
– Ideal for Warm Weather or Last-Minute Gatherings: As temperatures rise, the desire for cold, refreshing treats increases. No-bake desserts provide a perfect solution, as they can be prepared and chilled ahead of time, making them an ideal choice for summer parties or unexpected visitors. With just a few ingredients, you can create a delightful dessert that complements warm weather perfectly.
Ingredients Overview
Before diving into the preparation of our No-Bake Banana Bliss Pudding Cups, let’s take a closer look at the key ingredients that contribute to this delectable treat:
– Ripe Bananas: Bananas are the star of this recipe, bringing a natural sweetness and rich flavor that pairs beautifully with the creamy pudding. The ripeness of the bananas is crucial; opt for bananas that are speckled with brown spots for the best flavor and texture.
– Vanilla Pudding Mix: This creamy base forms the heart of our pudding cups. The vanilla pudding mix provides a smooth, velvety texture that enhances the overall indulgence of the dessert.
– Milk: An essential ingredient for achieving the right consistency, milk is mixed with the pudding mix to create a luscious filling. The choice of milk—whether whole, skim, or a plant-based alternative—can be tailored to suit your dietary preferences.
– Vanilla Extract: A splash of vanilla extract elevates the flavor profile of the pudding, adding depth and richness that complements the bananas beautifully.
– Whipped Cream: Light and airy, whipped cream is folded into the pudding mixture to create a fluffy texture. This not only lightens the dessert but also adds a touch of decadence.
– Vanilla Wafers: These cookies provide a satisfying crunch, contrasting beautifully with the smooth pudding and creamy bananas. They also serve as a delightful base for layering the dessert.
– Optional Garnishes: To elevate the presentation, consider adding garnishes such as additional banana slices, a dollop of whipped cream, or a sprinkle of crushed vanilla wafers. These finishing touches can transform your pudding cups into an eye-catching dessert that’s sure to impress.
Step-by-Step Instructions
Now that you’re familiar with the ingredients, let’s break down the preparation process for our No-Bake Banana Bliss Pudding Cups. Follow these steps to create an unforgettable dessert that showcases the delicious flavors of bananas and vanilla.
Preparing the Pudding
1. Gather Your Ingredients: Start by collecting all the necessary ingredients. Having everything on hand will streamline the preparation process and ensure you don’t miss any key components.
2. Mix the Pudding: In a mixing bowl, combine the vanilla pudding mix with the specified amount of milk as directed on the package. Using a whisk, blend the mixture vigorously for about 2 minutes, or until it thickens to a smooth consistency. The whisking technique is vital to achieving a lump-free pudding base, so take your time to ensure it’s well combined.
3. Add Vanilla Extract: Once the pudding has thickened, stir in the vanilla extract. This step enhances the flavor and adds complexity to the pudding, making it even more delicious.
Folding in Whipped Cream
4. Prepare the Whipped Cream: In a separate bowl, whip heavy cream using an electric mixer on medium speed until soft peaks form. Be careful not to overwhip, as the cream can turn grainy. The goal is to achieve a light, fluffy texture that will lighten the pudding mixture.
5. Combine the Mixtures: Gently fold the whipped cream into the prepared pudding using a spatula. The folding technique is important here; it helps maintain the airiness of the whipped cream, ensuring that your pudding remains light and fluffy. Be gentle as you combine the two mixtures, as you want to avoid deflating the whipped cream.
6. Layering the Pudding Cups: Once the pudding and whipped cream are fully incorporated, it’s time to assemble your pudding cups. Start with a layer of crushed vanilla wafers at the bottom of each cup, followed by a layer of the banana pudding mixture. Repeat the layers until the cups are filled, leaving some space at the top for garnishes.
As you proceed through these steps, you’ll see how easy and enjoyable it is to create this no-bake dessert. The combination of creamy pudding, fresh bananas, and crunchy wafers will soon come together to form an irresistible treat that’s perfect for any occasion. Stay tuned for the next part, where we’ll delve deeper into the finishing touches and serving suggestions for your Banana Bliss Pudding Cups.

Layering Your Pudding Cups
The beauty of No-Bake Banana Bliss Pudding Cups lies not only in their delightful flavor but also in their visually appealing layers. Layering is an art that enhances both the presentation and the overall eating experience. Here are some essential tips for achieving the perfect layers in your pudding cups.
Starting with the Vanilla Wafers: Achieving the Perfect Crunch
Begin by placing a layer of vanilla wafers at the bottom of each cup. Choose high-quality vanilla wafers that are firm yet slightly sweet. This initial layer is crucial as it provides a satisfying crunch that contrasts beautifully with the creamy pudding and soft banana slices. To ensure maximum flavor, consider lightly crushing some of the wafers before layering them in the cups. This adds texture and allows the flavors to meld together more effectively.
Distributing Banana Slices: Balancing Sweetness
Next, it’s time to add the banana slices. Choose ripe bananas that are firm but not overly soft, as they will hold their shape better in the pudding cups. Cut the bananas into even slices to create a uniform look. Distribute the banana slices evenly over the vanilla wafers, ensuring that each cup has a balanced amount. The natural sweetness of the bananas adds a refreshing element that complements the richness of the pudding. For an added touch, sprinkle a bit of lemon juice over the banana slices to prevent browning and enhance their flavor.
Incorporating the Pudding Mixture: Achieving a Creamy Consistency
Now it’s time to add the star of the show—the pudding mixture. Use a spatula to gently spoon the pudding into each cup, ensuring it fills the gaps between the banana slices and wafers. Aim for a thick and creamy consistency—this is where the no-bake aspect shines! The pudding should be smooth and creamy, and spreading it carefully helps maintain the integrity of the layers.
Finishing Touches with Whipped Cream: Creating an Inviting Look
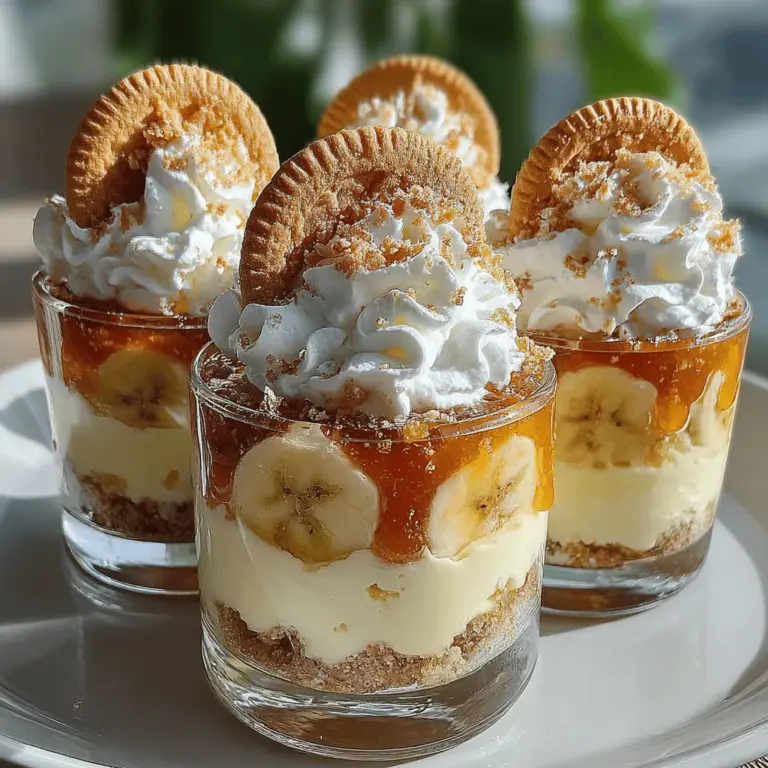
To finish off your banana pudding cups, add a generous dollop of whipped cream on top. This final layer not only adds a delightful creaminess but also elevates the visual appeal of each cup. For an extra touch of elegance, consider garnishing with a sprinkle of crushed vanilla wafers or a few banana slices on top. This not only enhances the presentation but also gives your guests a hint of what to expect in every bite.
Chilling for Perfection
Once your cups are layered and garnished, it’s time to chill them. Refrigeration is crucial for the pudding cups, as it allows the flavors to meld beautifully and the textures to develop.
How Chilling Enhances Flavor Melding
Chilling your Banana Bliss Pudding Cups for at least 2-4 hours (or overnight, if possible) allows the flavors to blend harmoniously. The cool temperature enhances the dessert’s refreshing quality, making it a perfect treat on warm days.
The Impact of Softened Wafers on Overall Texture
Refrigerating the pudding cups also has a unique effect on the vanilla wafers. As they sit in the pudding, they absorb moisture, softening slightly. This creates a delightful contrast between the creamy pudding, the softer banana slices, and the tender yet still slightly crunchy wafers. The result is a decadent dessert that is both creamy and satisfying.
Serving Suggestions
Your No-Bake Banana Bliss Pudding Cups are ready to be served, but here are some creative ideas to elevate your dessert experience.
Pairing with Complementary Beverages
Pair your pudding cups with a beverage that complements their sweetness. A rich cup of coffee or a light herbal tea can provide a delightful contrast to the dessert’s creamy texture. For a more festive occasion, consider serving these cups with a chilled glass of sweet iced tea or a fruity spritzer that enhances the banana flavors.
Creative Serving Ideas for Parties or Family Gatherings
These pudding cups are not only delicious but also versatile. For parties or family gatherings, consider creating a pudding cup station where guests can customize their cups with additional toppings such as chocolate shavings, crushed nuts, or fresh berries. This interactive element adds an exciting twist to your dessert presentation and allows everyone to enjoy a personalized treat.
For larger gatherings, you could also prepare a big trifle version of this dessert. Layer the pudding mixture, bananas, and wafers in a large glass bowl to create a stunning centerpiece that invites sharing and enjoyment.
Nutritional Information
Understanding the nutritional profile of your dessert can help you make informed choices, especially if you have specific dietary needs.
Caloric Content per Serving
Each serving of the Banana Bliss No-Bake Pudding Cups contains approximately 250-300 calories, depending on the amount of whipped cream and the specific ingredients used. This makes it a moderately indulgent dessert that can fit into a balanced diet when enjoyed in moderation.
Breakdown of Major Nutrients
– Carbohydrates: 40-45g
– Protein: 4-6g
– Fat: 10-15g
– Fiber: 1-2g
This dessert is rich in carbohydrates primarily from the vanilla wafers and bananas, providing a quick energy boost. The protein content comes mainly from the pudding mixture, especially if made with milk or yogurt.
Considerations for Dietary Adjustments
If you’re looking to make dietary adjustments, consider using a lower-fat milk alternative or sugar substitutes to reduce calories and sugar content. You can also substitute gluten-free vanilla wafers for those with gluten sensitivities.
Conclusion
The No-Bake Banana Bliss Pudding Cups are not just a dessert; they are a delightful experience that brings together the simplicity of preparation and the joy of indulgence. With their creamy texture, sweet banana flavor, and light whipped topping, these pudding cups are sure to become a favorite in your dessert rotation. They serve as a reminder that delicious treats can be made quickly and effortlessly, allowing you to share sweet moments with family and friends.
Enjoy the bliss of this easy-to-make dessert that embodies warmth and comfort, perfect for any occasion. Whether you’re serving them at a summer picnic, a holiday gathering, or simply enjoying a quiet evening at home, these pudding cups are sure to bring smiles and satisfaction to everyone who indulges in their delightful flavors.


