Quick & Zesty Dilly Beans Delight: A Tangy Snack You’ll Love
Pickling has enjoyed a resurgence in popularity in recent years, as more individuals seek to create flavorful, preservative-free foods at home. This age-old method not only extends the shelf life of various fruits and vegetables but also infuses them with bold, exciting flavors. Among the myriad of pickled treats, Dilly Beans have carved out a special niche as a tangy, crunchy snack option that is both delicious and easy to make. In this article, we’ll delve into the delightful world of Dilly Beans, explore their historical roots, and guide you through the straightforward process of making them.
Understanding Dilly Beans
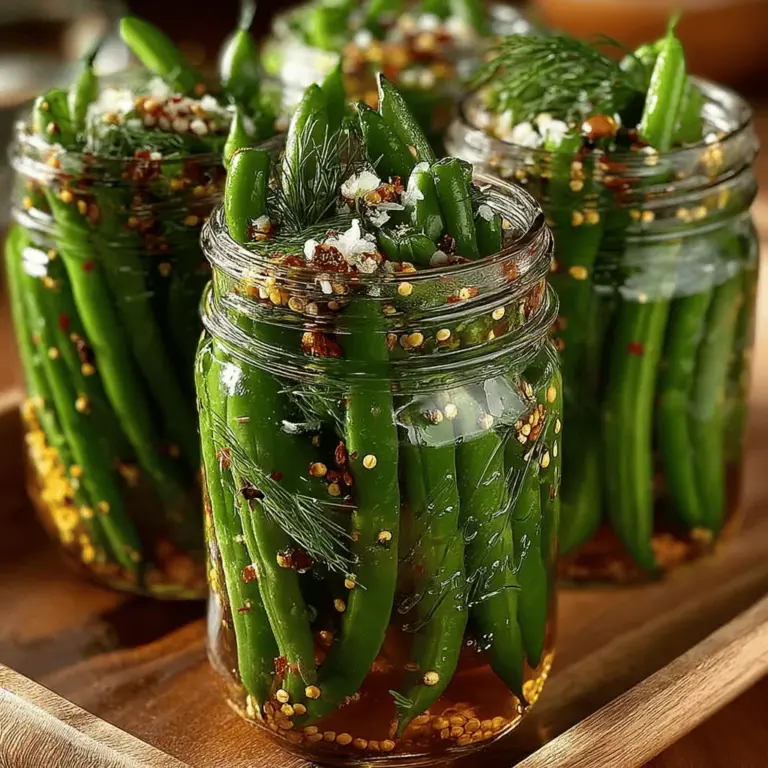
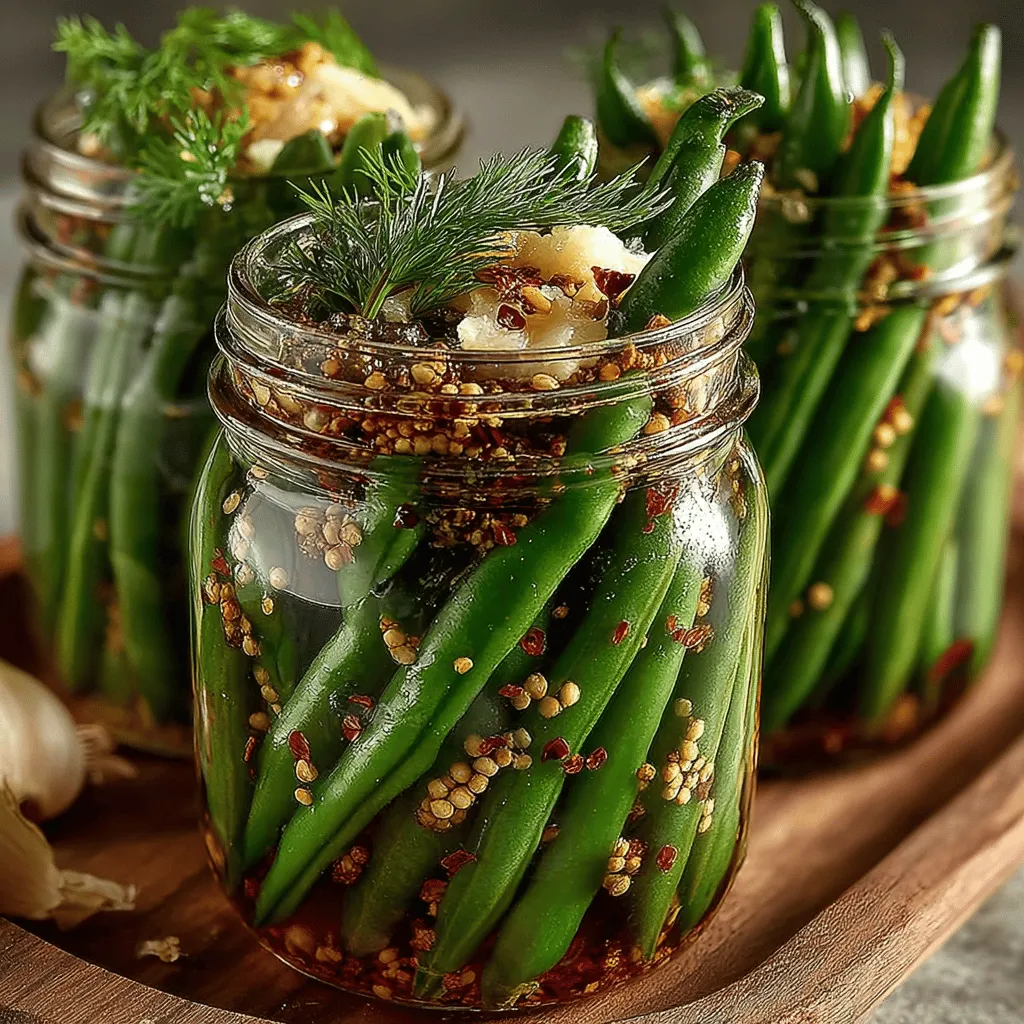
Dilly Beans are simply pickled green beans, and their name hints at the key ingredient—dill, a herb known for its unique flavor and aromatic qualities. These vibrant green snacks are not only visually appealing but also provide a satisfying crunch that makes them perfect for snacking, garnishing, or adding to salads. The basic concept behind Dilly Beans is quite simple: fresh green beans are blanched and then immersed in a zesty vinegar brine, which infuses them with flavor while preserving their crisp texture.
The practice of pickling green beans can be traced back centuries, with roots in various cultures around the world. Historically, pickling served as a crucial method for preserving food before refrigeration became commonplace. This technique not only helped to prevent spoilage but also allowed for the creation of exciting flavor profiles that enhanced the eating experience. Today, Dilly Beans continue to be a beloved recipe for home cooks seeking a quick and flavorful way to enjoy seasonal produce.
Nutritionally, green beans are a powerhouse of vitamins and minerals. They are low in calories yet rich in dietary fiber, making them an excellent choice for those looking to maintain a healthy diet. Green beans are also a good source of vitamins A, C, and K, as well as folate and manganese. This combination of health benefits, along with their delightful crunch and flavor, makes Dilly Beans a guilt-free indulgence.
Why Pickling is a Great Preservation Method
Pickling is not only an effective food preservation technique but also a culinary art that enhances the flavor and texture of ingredients. The process of pickling typically involves immersing food in a solution of vinegar, salt, and spices. This brine creates an acidic environment that inhibits the growth of bacteria, allowing the food to be safely stored for longer periods.
One of the significant advantages of homemade pickles, such as Dilly Beans, is the ability to control the ingredients and flavors. Unlike many store-bought pickles, which may contain artificial preservatives, high levels of sodium, or added sugars, homemade versions can be tailored to suit individual tastes and dietary preferences. This not only results in a fresher and more vibrant product but also allows for experimentation with various herbs and spices to create unique flavor combinations.
Acidity plays a crucial role in the pickling process, serving both as a preservative and as a flavor enhancer. Vinegar, the primary source of acidity in the brine, not only helps to preserve the green beans but also infuses them with a tangy punch that elevates their natural flavor. The balance of acidity with other ingredients, such as sugar and spices, creates a complex and satisfying taste that makes Dilly Beans an irresistible snack.
Ingredients Breakdown
Now that we have a better understanding of Dilly Beans and the benefits of pickling, let’s dive into the ingredients that make this recipe come to life.
1. Fresh Green Beans: The star of the show, fresh green beans, should be the right variety—look for crisp, vibrant, and unblemished beans. Snapping the ends off before blanching ensures a clean presentation. When selecting green beans, choose those that are firm and bright green, as this indicates freshness and quality. Additionally, beans should be harvested at their peak for the best flavor and texture.
2. Distilled White Vinegar: This ingredient is crucial for the pickling process. Distilled white vinegar has a sharp, clean flavor that complements the green beans without overpowering them. Its high acidity level helps to preserve the beans and contributes to the tangy flavor profile that makes Dilly Beans so appealing.
3. Kosher Salt and Sugar: Both of these ingredients play vital roles in the brining process. Kosher salt is preferred for pickling because it dissolves easily and enhances the flavor without making the brine overly salty. Sugar balances the acidity of the vinegar, creating a well-rounded flavor that enhances the overall taste of the Dilly Beans.
4. Spices: The inclusion of spices is what truly elevates Dilly Beans from a simple pickle to a culinary delight. The recipe typically calls for garlic, mustard seeds, dill seeds, red pepper flakes, and black peppercorns. Each of these spices contributes its unique flavor and health benefits. Garlic adds depth and savory notes, while mustard seeds and dill seeds offer a burst of flavor that pairs beautifully with the beans. Red pepper flakes introduce a hint of heat, appealing to those who enjoy a spicy kick, while black peppercorns add warmth and complexity.
5. Optional Ingredients: Fresh dill sprigs are often added to the brine for an additional layer of flavor. The bright, herbaceous notes of fresh dill complement the tanginess of the pickled beans, making them even more irresistible.
As we embark on the journey of creating Quick & Zesty Dilly Beans Delight, we will explore the preparation steps that will transform fresh green beans into a tangy, crunchy snack you can enjoy for weeks to come. Stay tuned as we guide you through the initial steps of blanching and preparing the brine, setting the stage for your pickling adventure.
Step-by-Step Instructions for Preparation
Preparing the Beans
The first step in creating your Quick & Zesty Dilly Beans is to prepare the green beans properly. Blanching is a crucial technique that not only helps to preserve the vibrant color of your beans but also enhances their flavor and texture. To blanch your beans, bring a large pot of salted water to a rolling boil. Add the cleaned green beans and let them cook for about 2-3 minutes. Once they are bright green and tender-crisp, immediately transfer them to a bowl of ice water. This ice bath method halts the cooking process, ensuring your beans remain crunchy and fresh. After a few minutes, drain the beans and set them aside to cool completely.
Creating the Pickling Liquid
Next, it’s time to create the pickling liquid, which is the heart of your Dilly Beans. In a medium saucepan, combine equal parts water and white vinegar—about 1 cup of each for a standard batch. Add in 2 tablespoons of kosher salt and 2 tablespoons of sugar to balance the acidity. For flavor enhancement, consider adding spices such as mustard seeds, peppercorns, and crushed red pepper flakes. Heat the mixture over medium heat until the salt and sugar dissolve completely. Taste the brine to ensure the balance of flavors is to your liking; you can adjust the sweetness or acidity by adding more sugar or vinegar if desired.
Adding Flavor
Once your brine is ready, let it cool to room temperature. This is an important step, as pouring hot brine over the beans can cook them further, affecting their texture. Allowing the brine to cool also allows the flavors to infuse more deeply, resulting in a more flavorful pickling solution. Feel free to add fresh herbs like dill or garlic cloves to this cooling brine for an extra layer of flavor that will elevate your Dilly Beans.
Packing the Jars
While the brine cools, it’s essential to prepare your jars for packing. Start by thoroughly sterilizing your jars and lids. You can do this by placing them in boiling water for 10 minutes or running them through a hot cycle in your dishwasher. Once sterilized, let the jars cool slightly before packing. Begin filling each jar with the blanched green beans, standing them upright for an attractive presentation. Aim to pack them tightly but without crushing the beans. Add a few sprigs of fresh dill or slices of garlic between the beans for added flavor.
Pouring the Brine
After packing the jars with beans and flavorings, it’s time to pour in the brine. Ensure you pour the brine over the beans until they are fully submerged, which helps to prevent spoilage. To avoid air pockets, use a clean knife or a chopstick to gently press down on the beans and release any trapped air bubbles. It’s crucial that the beans are completely covered by the brine to ensure even pickling.
Sealing and Refrigerating
Once the jars are filled, seal them tightly with the lids. Let them cool to room temperature before placing them in the refrigerator. This cooling process is vital as it allows the flavors to meld together while also ensuring the beans are stored at the right temperature. For optimal flavor, let your Dilly Beans marinate for at least 24 hours before consuming, although they can be enjoyed sooner if you’re impatient.
Enjoying Your Dilly Beans
After the marination time, your Dilly Beans are ready to be enjoyed! They make a fantastic snack on their own or can be incorporated into various dishes. Try serving them as a crunchy addition to salads or alongside sandwiches. They also pair excellently with charcuterie boards, adding a zesty kick that complements meats and cheeses beautifully. For an interesting twist, chop them up and mix them into potato salad or coleslaw for an extra burst of flavor.
Storage and Shelf Life
Best Practices for Storing Pickled Dilly Beans
Proper storage is key to maintaining the freshness and flavor of your Dilly Beans. Store them in the refrigerator in an airtight container. It’s best to keep them submerged in the brine to prevent exposure to air, which can lead to spoilage. Ensure your jars have tight-fitting lids to keep out any unwanted bacteria.
Discussion on How Long They Can Be Kept
Your homemade Dilly Beans can last for up to 2-3 months in the refrigerator, maintaining their crispness and flavor. However, for the best taste and texture, it is advisable to consume them within the first month. After this time, their texture may start to soften, although the flavor will continue to develop, creating a more intense taste.
Insight into Flavor Development Over Time
As your Dilly Beans sit in the brine, the flavors will continue to deepen and mature. The longer they are stored, the more pronounced the pickling spices and herbs will become. This gradual infusion process allows for a unique tasting experience, as each jar can taste slightly different depending on how long you let them marinate.
Culinary Uses for Dilly Beans
Versatile Uses: As a Snack, in Salads, or as Part of a Charcuterie Board
Dilly Beans are incredibly versatile and can be enjoyed in various ways. They are perfect as a quick snack on their own, providing a crunchy, tangy treat that satisfies cravings. You can also slice them and toss them into salads for added crunch and flavor. They work beautifully on charcuterie boards, providing a refreshing contrast to meats and cheeses, and are sure to impress your guests.
Creative Recipes Incorporating Dilly Beans into Meals
Beyond snacking, consider incorporating Dilly Beans into your meals creatively. They can add a zesty element to a summer pasta salad or be used as a garnish for cocktails, such as Bloody Marys, bringing a unique twist to your drink. Additionally, you can chop them up and add them to grain bowls, enhancing flavors and textures while providing a nutritional boost.
Suggestions for Serving with Different Cuisines and Dishes
Dilly Beans complement many dishes and cuisines. Pair them with grilled meats to balance the richness with their tangy crunch. They also work well with Mexican dishes, providing a fresh contrast to spicy flavors. You can serve them alongside barbecued foods, adding a zesty kick that will brighten up your plate. Experiment with different cuisines and let the Dilly Beans shine in your culinary creations.
Conclusion
Making your own Dilly Beans is a rewarding and enjoyable process that brings the fresh flavors of summer into your kitchen, even during the colder months. The satisfaction of creating a delicious, homemade condiment cannot be overstated, especially when you can control the ingredients and flavors to suit your taste. Don’t hesitate to experiment with different spices, herbs, and even types of beans as you perfect your recipe.
Homemade pickling is not just about preserving food; it’s about enjoying the vibrant flavors of fresh produce and the satisfaction of creating something unique. So gather your ingredients, put on your apron, and enjoy the journey of crafting your perfect Dilly Beans. As you venture into this exciting culinary world, remember that each batch can be an opportunity to explore new flavors and variations. Happy pickling!
