Frozen Yogurt Chocolate Toffee Bars: A Healthy Dessert Delight
In recent years, frozen yogurt has surged in popularity as a healthier dessert alternative, captivating taste buds and satisfying sweet cravings without the guilt associated with traditional ice cream. As consumers become more health-conscious, the appeal of frozen yogurt lies not only in its delightful taste but also in its versatility, making it an ideal base for a wide array of desserts. One standout recipe that embodies this trend is the Frozen Yogurt Chocolate Toffee Bars. These bars are not only a delicious treat but also a nutritious option that can cater to various dietary preferences.
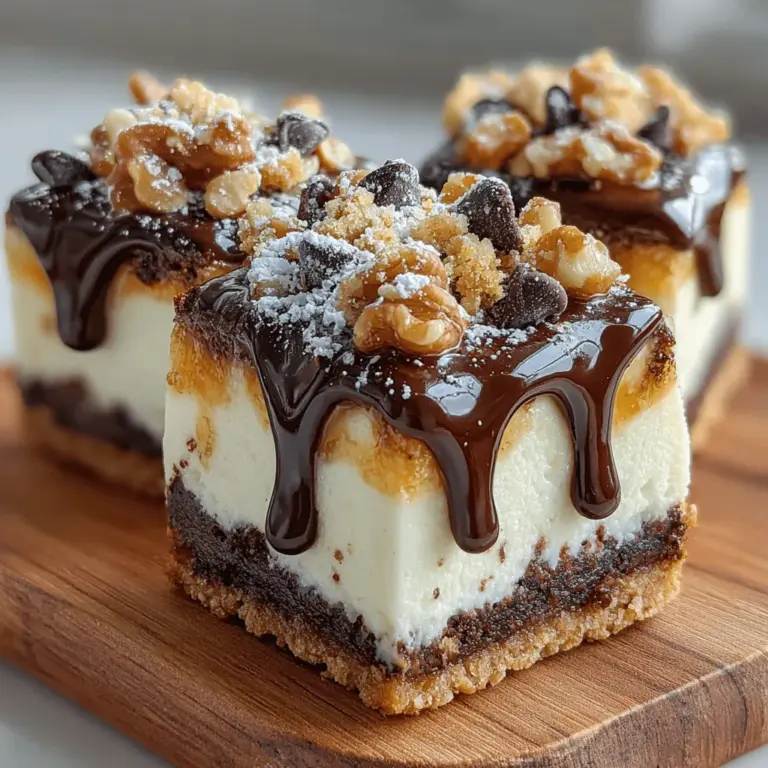
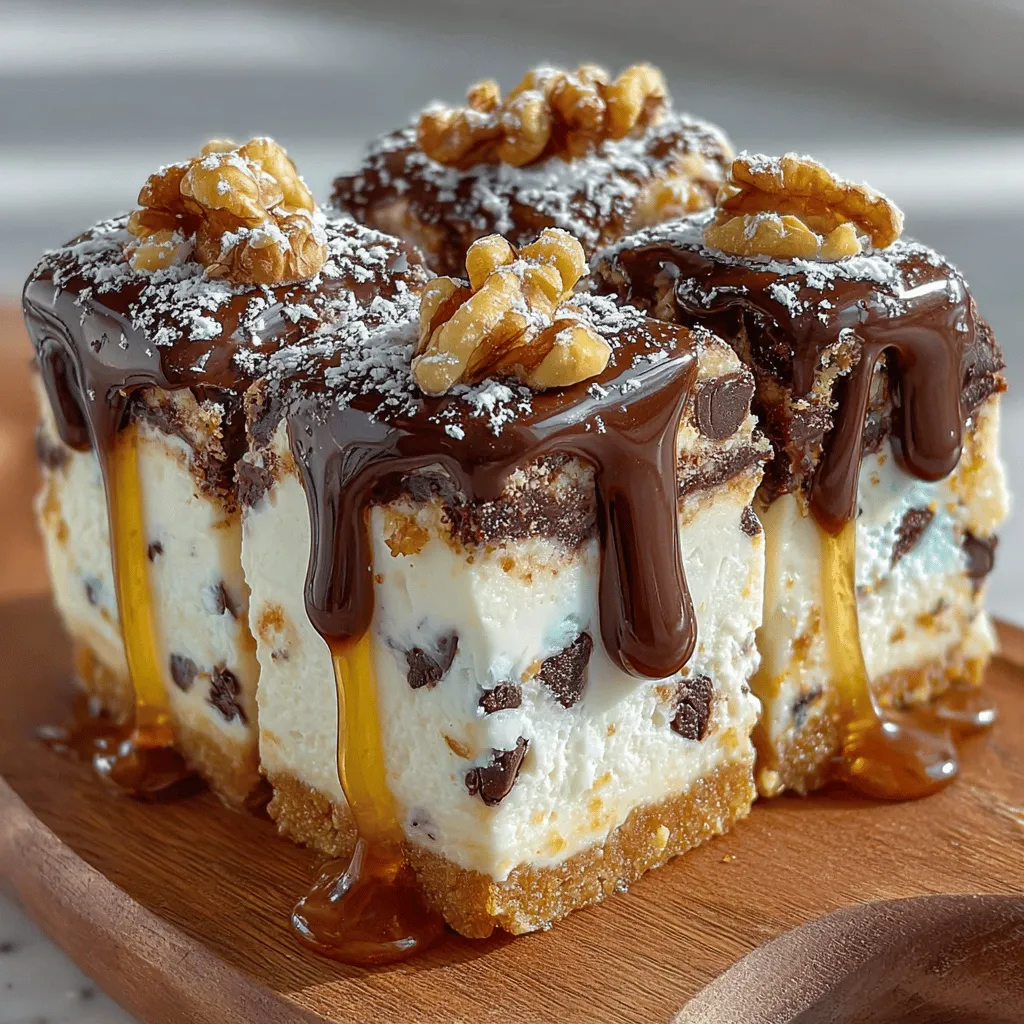
The Frozen Yogurt Chocolate Toffee Bars combine the creamy richness of Greek yogurt with the delightful crunch of toffee and the indulgence of chocolate, creating a dessert that is both satisfying and nourishing. Whether you follow a gluten-free lifestyle, are looking for a dairy alternative, or simply want a delicious dessert that won’t derail your healthy eating goals, this recipe has something for everyone.
Understanding Frozen Yogurt
Before diving into the specifics of the recipe, it’s helpful to understand what frozen yogurt truly is and why it stands out among other frozen treats. Frozen yogurt, often abbreviated as “froyo,” is a frozen dessert made from yogurt and sometimes other dairy products. One of its primary advantages is its lower fat content compared to traditional ice cream, making it a favorable choice for those looking to reduce their calorie intake while still enjoying a sweet indulgence.
Beyond its lower fat levels, frozen yogurt is frequently rich in probiotics, which are beneficial bacteria that promote gut health. These probiotics can aid digestion, enhance immune function, and contribute to overall wellness. When you choose to make frozen yogurt at home, you also have the opportunity to customize flavors and sweetness levels, making it a versatile option that can easily adapt to your personal taste preferences.
For this recipe, using plain Greek yogurt is essential. Greek yogurt not only provides a creamy texture that rivals traditional ice cream but also packs a protein punch. This means that each bite of your Frozen Yogurt Chocolate Toffee Bars is not only satisfying but also helps keep you fuller for longer, making it a smart snack choice.
Ingredients Overview
To create your Frozen Yogurt Chocolate Toffee Bars, you’ll need a handful of simple yet effective ingredients. Here’s a breakdown of the key components that come together to form this delicious treat:
1. Plain Greek Yogurt: This is the foundation of your bars. Not only does it lend a creamy consistency, but it also provides health benefits such as protein, calcium, and probiotics. Opting for full-fat or low-fat versions can depend on your dietary needs, but either choice will work beautifully in this recipe.
2. Honey or Maple Syrup: Both of these natural sweeteners will add a touch of sweetness to your yogurt base. Honey offers a mild floral flavor, while maple syrup brings a rich, earthy sweetness. The choice between the two largely depends on your flavor preference or dietary restrictions (e.g., vegan diets can opt for maple syrup).
3. Vanilla Extract: This ingredient elevates the flavor profile of your frozen yogurt. A splash of pure vanilla extract enhances the overall aroma and taste, bringing a lovely warmth to the dish.
4. Mini Chocolate Chips and Crushed Toffee Bits: These are the stars of the topping, adding delightful texture and indulgence to each bar. The chocolate chips provide a rich chocolate flavor, while the toffee bits deliver a satisfying crunch and a sweet, buttery taste that beautifully complements the yogurt.
5. Optional Crushed Walnuts: If you’re looking to add an extra layer of nutrition, consider tossing in some crushed walnuts. They’re packed with healthy fats, protein, and fiber, making your dessert not just tasty, but also a bit more wholesome.
6. Dark Chocolate and Coconut Oil: For the chocolate topping, using dark chocolate melted with a bit of coconut oil creates a rich and shiny finish to your bars. This combination not only adds a luxurious touch but also makes for a healthier chocolate option, as dark chocolate is lower in sugar and rich in antioxidants.
Step-by-Step Instructions
Now that you have a clear understanding of the ingredients, it’s time to dive into the preparation of your Frozen Yogurt Chocolate Toffee Bars. The process is simple and can be broken down into a few key steps to ensure your bars turn out perfectly.
1. Preparing the Yogurt Mixture
Start by gathering a mixing bowl and adding your plain Greek yogurt. To this, add your chosen sweetener—whether honey or maple syrup—and the vanilla extract. Using a whisk or a hand mixer, blend these ingredients together until the mixture is smooth and well combined. It’s crucial to mix until there are no lumps in the yogurt, as this will ensure an even texture in your final bars. This step is important for achieving that creamy consistency that is so satisfying in frozen desserts.
2. Adding Chocolate Chips and Toffee
Once your yogurt mixture is smooth, it’s time to fold in the mini chocolate chips and crushed toffee bits. Use a spatula to gently fold these ingredients into the yogurt base. Be careful not to overmix, as you want to maintain the texture of the chocolate chips and toffee. The goal is to evenly distribute these ingredients so that every bite of your bars has a delightful crunch and a burst of chocolate flavor.
3. Lining the Baking Pan
Next, prepare your baking pan for freezing. Line a rectangular baking dish (or an 8×8 square pan) with parchment paper or plastic wrap. This step is vital, as it allows for easy removal of the frozen bars once they’re set. Make sure the lining extends over the edges of the pan, which will create a helpful handle for lifting the bars out later.
Now that your pan is prepared, carefully pour the yogurt mixture into the lined baking dish, smoothing the top with your spatula to ensure an even layer. Once smoothed, you can place the pan in the freezer to set.
These initial steps lay the groundwork for a deliciously creamy and indulgent treat that can be enjoyed at any time. In the next part of the article, we will continue with the subsequent steps, including preparing the rich chocolate topping and slicing the bars for serving. Stay tuned for more delicious details on how to create your own Frozen Yogurt Chocolate Toffee Bars!
Spreading the Mixture
Once your yogurt mixture is well-blended, it’s time to spread it into your prepared pan. Achieving an even spread is crucial for uniform bar sizes and ensures that every bite is delicious. Here are some techniques to help you spread the mixture evenly:
1. Use a Rubber Spatula: Start by using a rubber spatula to scoop the mixture from the bowl into the center of the prepared pan. This material is flexible, allowing you to push the mixture into the corners easily.
2. Tilt the Pan: Gently tilt the pan in various directions to encourage the mixture to fill the corners. This technique helps in avoiding air pockets that could lead to uneven freezing.
3. Leveling Off: Once the mixture is in place, use the spatula to level off the top. Drag the spatula across the surface in gentle, sweeping motions to create a smooth, even layer.
4. Chill Before Topping: For best results, chill the mixture for about 30 minutes before adding any toppings. This allows it to set slightly, making it easier to work with when you drizzle the chocolate on top later.
Melting the Topping Chocolate
The chocolate topping is a delightful addition that elevates your frozen yogurt bars. However, melting chocolate can be tricky if not done correctly. Here are safe methods for melting chocolate while avoiding burning:
1. Double Boiler Method: Fill a saucepan with about an inch of water and bring it to a simmer. Place a heat-safe bowl on top, ensuring it doesn’t touch the water. Add your chocolate to the bowl and stir frequently until melted. This method provides gentle, even heat.
2. Microwave Method: If you prefer a quicker approach, you can use the microwave. Place chopped chocolate in a microwave-safe bowl and heat it in 20-second intervals, stirring in between. Continue until the chocolate is fully melted and smooth. Be cautious, as overheating can cause the chocolate to seize.
3. Avoiding Water: Ensure that no water gets into the chocolate, as even a drop can cause it to clump. Keep your utensils dry and clean.
Drizzling and Freezing
Creating a marbled effect with your melted chocolate adds an artistic touch to your bars. Here are some tips for drizzling and freezing effectively:
1. Drizzling Technique: Once your chocolate is melted, use a spoon or a piping bag with the tip cut off to drizzle the chocolate over the yogurt mixture. Create back-and-forth motions to achieve a beautiful marbled pattern.
2. Thickness Control: Adjust the thickness of the chocolate drizzle to your liking. If the chocolate is too thick, it may not drizzle well. You can thin it by adding a small amount of coconut oil or shortening, which will also help it set more smoothly.
3. Freezing: After drizzling, place the pan in the freezer. Aim for a freezing time of at least 4 hours, or until the bars are firm to the touch. The surface should feel solid, and the mixture should no longer be sticky.
Cutting and Serving
Cutting the frozen bars properly ensures clean edges and an appealing presentation. Follow these best practices for cutting and serving:
1. Warm Blade: To cut through the frozen mixture easily, warm your knife under hot water for a few seconds. Wipe it dry before making the cut. This technique helps prevent the bars from cracking.
2. Cutting Technique: Start by cutting the bars into even squares or rectangles. Depending on your preference, you can create larger or smaller pieces. A ruler can help measure if you want precise sizes.
3. Serving Suggestions: Serve the bars immediately after cutting, or place them back in the freezer until ready to enjoy. Pair them with fresh fruit or a dollop of yogurt for an extra treat.
Storing Leftovers
If you have any leftover bars, proper storage is key to maintaining their freshness. Here’s how to store your Frozen Yogurt Chocolate Toffee Bars effectively:
1. Airtight Container: Place the cut bars in an airtight container. If stacking them, separate layers with parchment paper to prevent them from sticking together.
2. Freezing: Store them in the freezer for up to 2 months. Ensure the container is well-sealed to avoid freezer burn.
3. Thawing: When you’re ready to enjoy a bar, simply remove it from the freezer and let it sit at room temperature for a few minutes before serving. This will soften the bars slightly for easier eating.
Nutritional Information
Understanding the nutritional benefits of your Frozen Yogurt Chocolate Toffee Bars can help you appreciate this dessert even more. Here’s a breakdown of the nutritional content per serving:
– Calories: Approximately 150 calories
– Protein: 5 grams
– Healthy Fats: 9 grams (from the nuts and chocolate)
– Sugar: 10 grams (from natural sweeteners)
These bars are a healthier dessert option compared to traditional ice creams, thanks to the use of wholesome ingredients like Greek yogurt. The yogurt provides a good source of protein and calcium, while the dark chocolate offers antioxidants.
In addition, using natural sweeteners keeps the sugar levels in check, making this dessert satisfying yet guilt-free.
Variations and Customizations
One of the most delightful aspects of this recipe is its versatility. Here are some suggestions for alternative sweeteners, toppings, and flavor variations to suit your taste:
1. Alternative Sweeteners: If you prefer a different sweetness level, consider using agave syrup, honey, or maple syrup instead of granulated sugar. Each will impart its unique flavor profile, allowing for customization.
2. Toppings: Explore different toppings to enhance your bars. Chopped nuts, such as almonds or walnuts, can add crunch. Dried fruits like cranberries or apricots provide a chewy texture, while seeds like chia or sunflower seeds can introduce a nutty flavor.
3. Flavor Variations: For a fruity twist, try adding fruit purees like strawberry or mango to the yogurt mixture. A dash of cinnamon or vanilla extract can also elevate the flavor, making each batch uniquely delicious.
4. Dietary Adaptations: For those following gluten-free or dairy-free diets, substitute traditional yogurt with coconut or almond yogurt. These alternatives maintain the creamy texture while accommodating dietary restrictions.
Conclusion
The Frozen Yogurt Chocolate Toffee Bars are not just a treat; they are a delightful and healthier dessert choice that you can easily customize to fit your preferences. With simple ingredients and straightforward instructions, you can create a delicious dessert that caters to your taste buds and dietary needs.
We encourage you to try making this recipe and explore the various variations and toppings available. The satisfaction of creating a homemade treat that aligns with your personal tastes and health goals is unmatched. Enjoy the process and the delightful results of your Frozen Yogurt Chocolate Toffee Bars!
