Weight Loss Banner

Chill Out Cookies ‘n Cream Bars Recipe

WANT TO SAVE THIS RECIPE?

Chill Out Cookies ‘n Cream Bars: A Delightful No-Bake Treat

Introduction

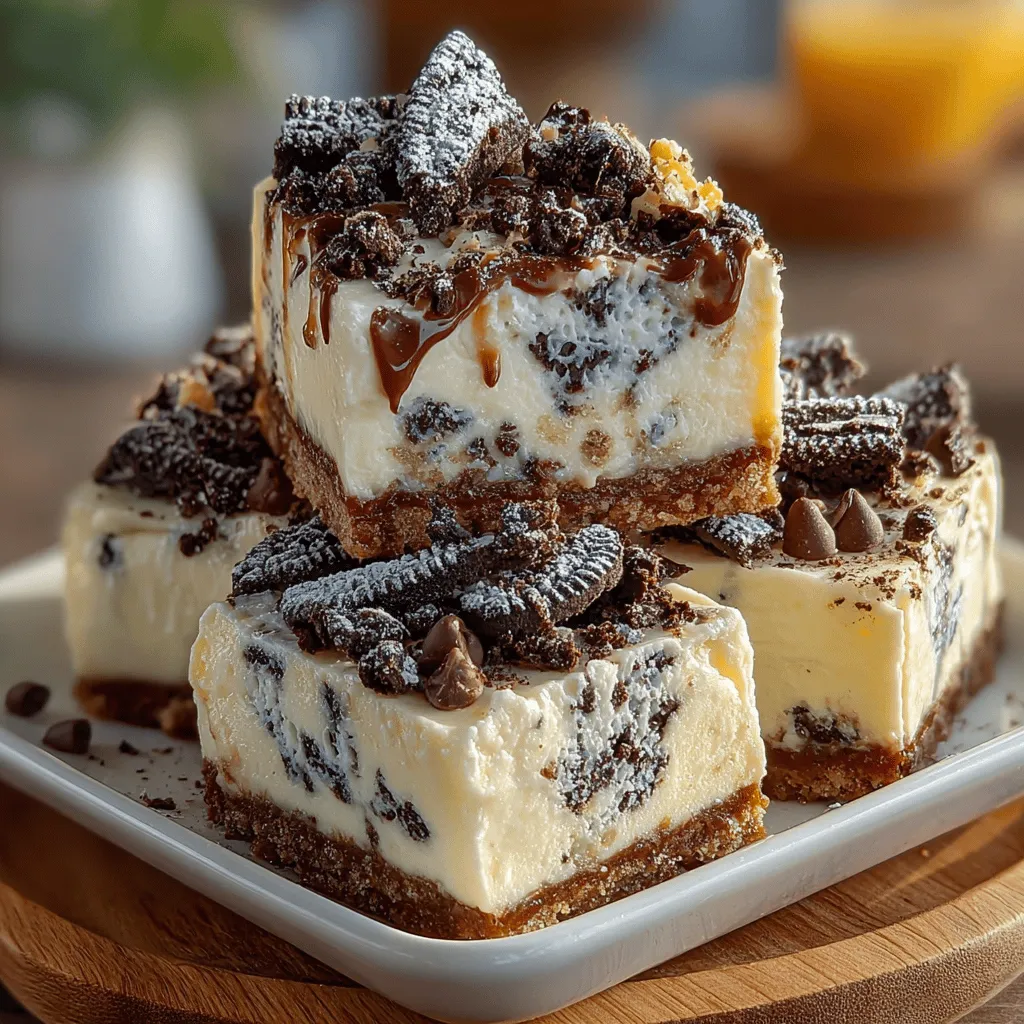
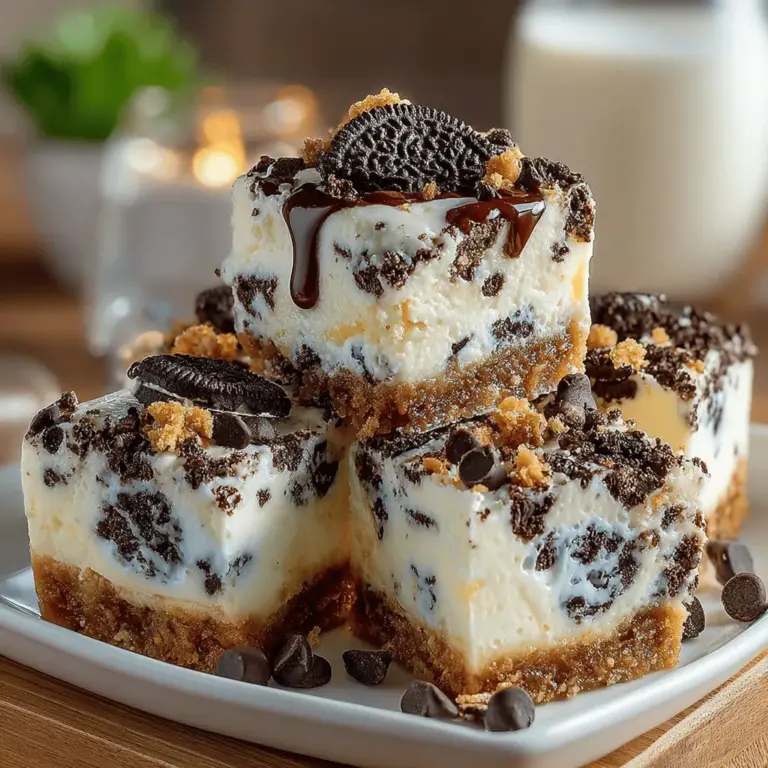
Indulging in a sweet treat doesn’t always have to mean spending hours in the kitchen. The Chill Out Cookies ‘n Cream Bars combine the creamy goodness of yogurt and heavy cream with the beloved crunch of Oreo cookies to deliver a delectable dessert that is both easy to prepare and satisfying. This no-bake recipe is perfect for warm weather or any time you’re craving something cool and sweet without the fuss. In this article, we will explore the ingredients, preparation steps, and the joy of enjoying these delicious bars, along with some insights into their appeal.

The allure of no-bake desserts is undeniable, especially during the hotter months when the last thing you want to do is turn on your oven. These Cookies ‘n Cream Bars are not just convenient; they are also incredibly versatile and can be customized to suit various tastes. Whether you’re hosting a summer gathering, celebrating a birthday, or simply treating yourself, these bars offer a delightful balance of creaminess and crunch, making them a favorite for both kids and adults alike.

Understanding the Ingredients

The key to the success of Chill Out Cookies ‘n Cream Bars lies in its simple yet delightful ingredients. Each component plays a crucial role in achieving the perfect texture and flavor.

The Base Ingredients

Vanilla Yogurt: This creamy base adds a tangy flavor that lightens the overall dish, creating a perfect contrast to the sweetness of the other ingredients. Using a high-quality vanilla yogurt ensures that your bars have a rich and delectable taste.

Heavy Cream: Essential for achieving a luscious texture, heavy cream enhances the richness of the bars. When whipped, it creates a fluffy consistency that makes each bite feel indulgent.

Sweetened Condensed Milk: A staple in many no-bake desserts, sweetened condensed milk provides the necessary sweetness and creaminess, binding the ingredients together without the need for baking.

Vanilla Extract: This addition amplifies the flavor profile of the bars, complementing the cookies beautifully and enhancing the overall dessert experience.

The Crunchy Elements

Oreo Cookies: The star of the show, Oreo cookies add a beloved chocolatey crunch that is hard to resist. Their distinctive flavor and texture create a contrast with the smooth creaminess of the base ingredients, making each bite a delightful combination of flavors.

Mini Chocolate Chips: While optional, these tiny morsels of chocolate can add an extra layer of richness and sweetness to the bars. For chocolate lovers, incorporating mini chocolate chips can elevate the experience even further.

The Pinch of Salt

A small addition but an important one, a pinch of salt balances the sweetness of the other ingredients. This balancing act enhances the overall flavor profile, ensuring that the bars are not overly sweet and that each component shines through.

Step-by-Step Preparation

Creating these bars is a straightforward process that requires minimal effort, making it ideal for bakers of all levels. Here’s how to get started:

Mixing the Base

Begin by gathering all your ingredients and equipment. You will need a mixing bowl, a spatula, and an 8×8-inch baking dish lined with parchment paper for easy removal after chilling.

1. Combine the Yogurt and Heavy Cream: In a large mixing bowl, add the vanilla yogurt and heavy cream. Using a spatula or a whisk, gently fold the two together until they are well combined. The mixture should be smooth and creamy, with no lumps.

2. Incorporate Sweetened Condensed Milk: Gradually pour in the sweetened condensed milk, stirring continuously. This step is crucial, as it binds the mixture and adds the desired sweetness. Continue mixing until everything is evenly blended.

3. Enhance with Vanilla Extract: Add the vanilla extract to the creamy mixture. This will deepen the flavor and complement the Oreo cookies perfectly. Stir until fully incorporated.

As you mix the base, take a moment to appreciate the luscious texture developing in the bowl. The combination of yogurt and heavy cream creates a luxurious foundation for your bars, setting the stage for the crunchiness to come.

Next, it’s time to prepare the Oreo cookies.

4. Prepare the Oreo Cookies: Take your Oreo cookies and crush them into small pieces. You can do this by placing them in a zip-top bag and using a rolling pin or a heavy object to crush them into chunks. Alternatively, a food processor can make this task quick and easy. Aim for a mix of fine crumbs and larger pieces to give the bars both texture and visual appeal.

5. Combine the Crunchy Elements: Once your cookies are crushed, fold them into the creamy mixture. If you’re using mini chocolate chips, this is the time to add them as well. Stir carefully to ensure the cookie pieces are evenly distributed throughout the mixture.

The anticipation builds as you see the rich, creamy mixture dotted with bits of Oreo, ready to be transformed into a delightful dessert.

With the base fully prepared, you are now ready to move on to the next step of assembling your Cookies ‘n Cream Bars. Stay tuned as we guide you through the chilling and cutting process, ensuring that your dessert reaches its full potential.

To kick off the creation of your Chill Out Cookies 'n Cream Bars, begin by assembling a large mixing bowl. Combine <strong>2 cups of vanilla yogurt</strong>, <strong>1 cup of heavy cream</strong>, <strong>1 can (14 ounces) of sweetened condensed milk</strong>, <strong>2 teaspoons of vanilla extract</strong>, and <strong>1/4 teaspoon of salt</strong>. Using a whisk, blend these ingredients together until the mixture is smooth and uniform in texture. This creamy base is the heart of your dessert, ensuring that every bite is rich and luscious.” /></p>
</p>
<h2>Combining the Creamy Base</h2>
</p>
<p>To kick off the creation of your Chill Out Cookies ‘n Cream Bars, begin by assembling a large mixing bowl. Combine <strong>2 cups of vanilla yogurt</strong>, <strong>1 cup of heavy cream</strong>, <strong>1 can (14 ounces) of sweetened condensed milk</strong>, <strong>2 teaspoons of vanilla extract</strong>, and <strong>1/4 teaspoon of salt</strong>. Using a whisk, blend these ingredients together until the mixture is smooth and uniform in texture. This creamy base is the heart of your dessert, ensuring that every bite is rich and luscious.</p>
</p>
<p>The vanilla yogurt serves as a healthier alternative to traditional ice cream, introducing a tangy flavor that balances the sweetness of the condensed milk. The heavy cream adds a luxurious body, while the vanilla extract enhances the overall taste profile, making the bars irresistibly delicious.</p>
</p>
<h2>Incorporating the Crunch</h2>
</p>
<p>Once your creamy mixture is ready, it’s time to add the crunch that defines these bars. Gently fold in <strong>1 1/2 cups of crushed Oreo cookies</strong> and <strong>1/2 cup of mini chocolate chips</strong>. Use a spatula for this step, which will help preserve the integrity of the cookies while ensuring they are evenly distributed throughout the creamy base. This combination not only adds texture but also infuses the mixture with the iconic cookies and cream flavor that we all love.</p>
</p>
<p>Be careful not to overmix; you want to maintain noticeable chunks of Oreo for that delightful crunch in every bite. The mini chocolate chips will also melt slightly during freezing, enhancing the overall chocolate flavor without overwhelming the dessert.</p>
</p>
<h2>Preparing for Freezing</h2>
</p>
<p>Now that you’ve incorporated the cookies and chocolate chips, it’s time to prepare for freezing. Line a <strong>9×9-inch square baking pan</strong> with parchment paper, ensuring to leave some overhang on the sides. This will make it easy to remove the frozen bars later. Pour the creamy mixture into the prepared pan, using a spatula to spread it out evenly. Make sure there are no air pockets, as these can affect the texture of the finished product.</p>
</p>
<p>To ensure a smooth surface, you can gently tap the pan on the counter. This will help eliminate any trapped air and give your bars a flawless finish once frozen.</p>
</p>
<h2>Topping for Texture</h2>
</p>
<p>For added flavor and texture, sprinkle an additional <strong>1/2 cup of crushed Oreo cookies</strong> over the top of the mixture before freezing. This not only enhances the visual appeal with a contrasting color but also gives a satisfying crunch with each bite. It’s the perfect finishing touch that makes these bars visually inviting and deliciously enticing.</p>
</p>
<h2>Freezing to Perfection</h2>
</p>
<p>Cover the pan with plastic wrap or a lid, and place it in the freezer. Allow the mixture to freeze for at least <strong>4-6 hours</strong>, or until the bars are firmly set. This step is crucial, as it transforms the creamy mixture into a delightful frozen treat. For best results, consider freezing it overnight, which will allow the flavors to meld beautifully.</p>
</p>
<p>When the bars are fully frozen, the parchment paper overhang will help you lift them out of the pan easily. This ensures that you get clean, even cuts when you’re ready to serve.</p>
</p>
<h2>Serving Suggestions</h2>
</p>
<p>Once the bars are frozen to perfection, it’s time to serve them. Carefully remove the frozen block from the pan using the parchment paper overhang. Place it on a cutting board and cut into squares or rectangles using a sharp knife. If you want cleaner cuts, consider running the knife under hot water and wiping it dry before slicing. This will help prevent any sticking and give you clean, beautiful edges.</p>
</p>
<p>These bars can be enjoyed as a cool, refreshing treat on their own, or you can get creative with your presentation. Consider serving them on a platter with fresh berries or drizzling chocolate sauce on top for an extra touch of decadence. They can also be paired with a scoop of vanilla ice cream for an over-the-top dessert experience.</p>
</p>
<h2>Storing Leftovers</h2>
</p>
<p>If you happen to have any leftovers (which is often unlikely due to their deliciousness), store them in an airtight container in the freezer. These bars can last for up to <strong>two weeks</strong>, maintaining their flavor and texture. Just be sure to separate layers with parchment paper to avoid sticking.</p>
</p>
<p>When you’re ready to enjoy them again, simply remove them from the freezer and let them sit for a few minutes at room temperature to soften slightly, making them easier to cut and eat.</p>
</p>
<h2>The Appeal of Chill Out Cookies ‘n Cream Bars</h2>
</p>
<p>Chill Out Cookies ‘n Cream Bars are not only easy to make, but they also cater to a broad spectrum of tastes. The combination of creamy yogurt and rich heavy cream results in a decadently smooth texture, while the crushed Oreo cookies provide that satisfying crunch we all crave. These bars are versatile, making them perfect for a summer gathering, a birthday party, or simply as a sweet treat after dinner.</p>
</p>
<p>The balance of flavors and textures in these bars makes them a crowd-pleaser. Whether you’re a cookies and cream lover or just someone looking for a delightful dessert to satisfy your sweet tooth, these bars deliver.</p>
</p>
<h2>Nutritional Insights</h2>
</p>
<p>While these bars are undeniably a treat, they also come with nutritional benefits. The use of yogurt introduces probiotics, which are beneficial for digestive health. Heavy cream, while indulgent, provides energy and richness, making these bars a more satisfying dessert option. The Oreos, although sweet, can be enjoyed in moderation as part of a balanced diet.</p>
</p>
<p>This dessert also offers an opportunity to incorporate healthier ingredients. For example, consider using low-fat yogurt or substituting some of the heavy cream with coconut cream for a dairy-free option. These adjustments can help you enjoy the deliciousness of the bars while making them a bit more health-conscious.</p>
</p>
<h2>Conclusion</h2>
</p>
<p>Chill Out Cookies ‘n Cream Bars are a delightful way to satisfy your sweet tooth without the need for extensive baking. With a few simple ingredients and a straightforward preparation process, you can create a delicious dessert that everyone will love. These bars are ideal for any occasion, proving that indulgence can be both easy and enjoyable.</p>
</p>
<p>So, the next time you’re in the mood for something sweet, remember this easy recipe and treat yourself to a refreshing dessert that captures the essence of cookies and cream in every bite. Whether enjoyed on a hot summer day or as a sumptuous finish to dinner, these bars are sure to impress and leave everyone asking for seconds. Enjoy your Chill Out Cookies ‘n Cream Bars and share the joy with friends and family!</p>
</div>

To kick off the creation of your Chill Out Cookies 'n Cream Bars, begin by assembling a large mixing bowl. Combine 2 cups of vanilla yogurt, 1 cup of heavy cream, 1 can (14 ounces) of sweetened condensed milk, 2 teaspoons of vanilla extract, and 1/4 teaspoon of salt. Using a whisk, blend these ingredients together until the mixture is smooth and uniform in texture. This creamy base is the heart of your dessert, ensuring that every bite is rich and luscious.

Frozen Yogurt Cookies ‘n Cream Bars

Discover the perfect no-bake dessert with Chill Out Cookies 'n Cream Bars! Combining creamy yogurt, rich heavy cream, and crunchy Oreo cookies, this easy recipe delivers a delightful treat ideal for warm days or any sweet craving. Simple to make and customizable, these bars are perfect for gatherings or a personal treat. Enjoy the heavenly balance of texture and flavor with every bite. Experience the joy of making and sharing this delicious dessert that everyone will love!

Ingredients
  

2 cups vanilla yogurt (Greek or regular)

1 cup heavy cream

½ cup sweetened condensed milk

1 teaspoon vanilla extract

1 cup Oreo cookies, crushed (plus extra for topping)

¼ cup mini chocolate chips (optional)

Pinch of salt

Instructions
 

Prepare the Mixture: In a large mixing bowl, combine the vanilla yogurt, heavy cream, sweetened condensed milk, vanilla extract, and a pinch of salt. Whisk until smooth and well incorporated.

    Add the Crunch: Gently fold in the crushed Oreo cookies and mini chocolate chips if using, ensuring they are evenly distributed throughout the mixture.

      Transfer to Pan: Line a 9x9-inch square baking pan with parchment paper, leaving some overhang for easy removal. Pour the cookie mixture into the prepared pan and spread it out evenly.

        Top It Off: Sprinkle additional crushed Oreo cookies on top of the mixture for an extra crunchy finish.

          Freeze: Cover the pan with plastic wrap or a lid and freeze for at least 4-6 hours, or until firmly set.

            Cut and Serve: Once frozen, remove the pan from the freezer. Use the overhanging parchment paper to lift the bars out of the pan. Cut into squares or rectangles and serve immediately.

              Store Leftovers: Any leftovers can be stored in an airtight container in the freezer for up to two weeks.

                Prep Time: 15 mins | Total Time: 6 hrs 15 mins | Servings: 12

                  WANT TO SAVE THIS RECIPE?

                  Leave a Comment

                  Recipe Rating