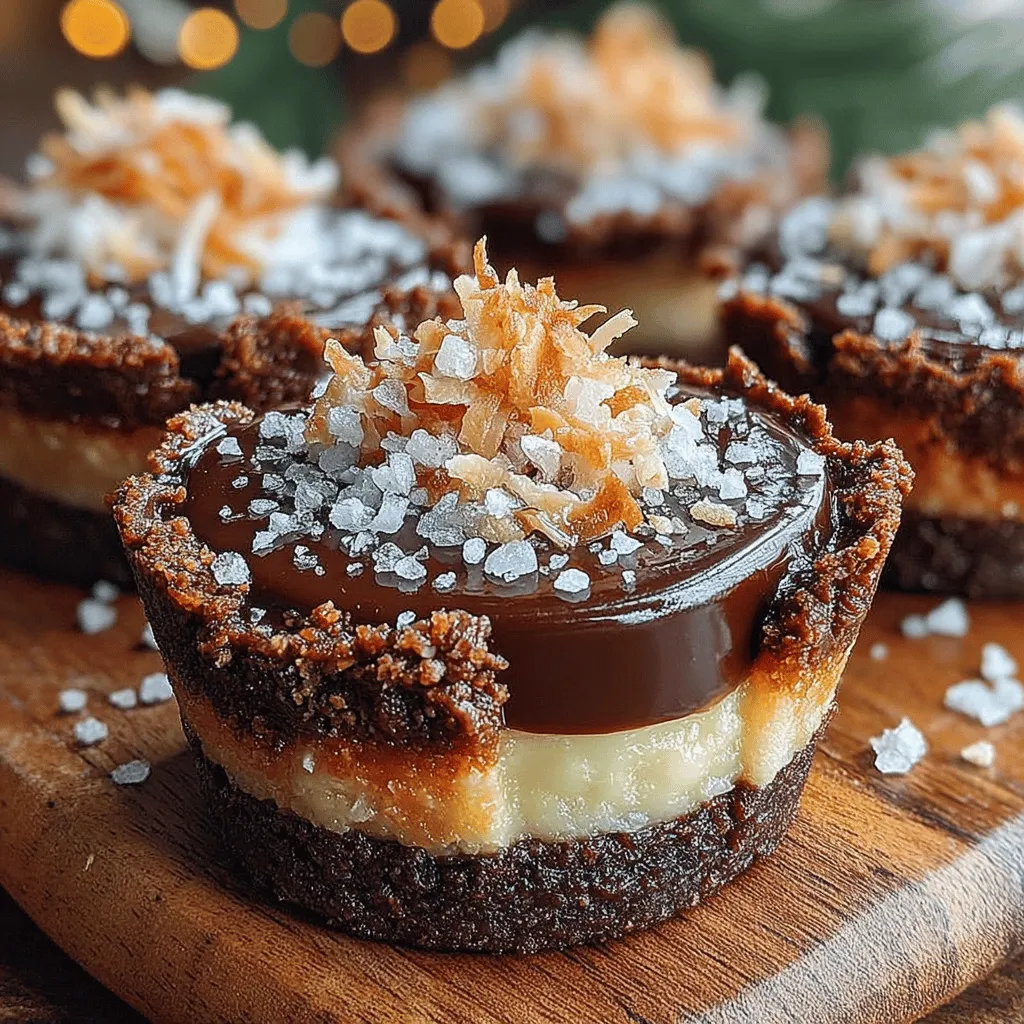
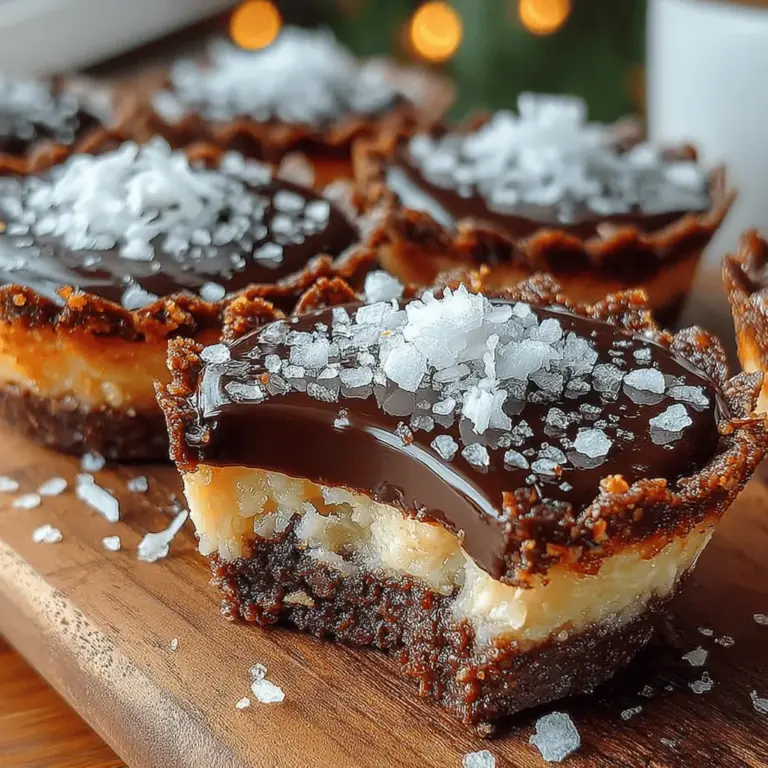
Delightfully Decadent No-Bake Chocolate Coconut Cups: A Sweet Indulgence
If you have a sweet tooth but are short on time, the Delightfully Decadent No-Bake Chocolate Coconut Cups are the perfect remedy. This recipe beautifully combines the rich, velvety taste of chocolate with the tropical essence of coconut, creating a dessert that is not only satisfying but also incredibly easy to prepare. No baking required means you can whip these up in a flash, making them an ideal treat for busy weeknights, last-minute gatherings, or simply when you want to indulge without the fuss.
The Allure of No-Bake Desserts
No-bake desserts have surged in popularity, and for good reason. They are a revelation for anyone who enjoys home-baked treats without the hassle of preheating the oven or monitoring baking times. With no-bake recipes, preparation is often as simple as mixing a few key ingredients together, resulting in delicious results that can be served immediately or chilled for later enjoyment. This convenience is particularly appealing in warmer months when turning on the oven can feel unbearable.
The Delightfully Decadent No-Bake Chocolate Coconut Cups exemplify this ease. By utilizing pantry staples and a few simple techniques, you can create an impressive dessert that offers all the satisfaction of traditional baked goods, minus the laborious steps.
A Beloved Flavor Pairing
One of the most enchanting aspects of this recipe is the combination of chocolate and coconut. This pairing is not just a coincidence; it has captured the hearts of dessert lovers around the world. The rich, creamy texture of coconut complements the deep, bittersweet notes of chocolate, resulting in a harmonious balance that is both comforting and indulgent. Whether enjoyed as a quick snack or served at a special occasion, these chocolate coconut cups promise to delight your taste buds.
Understanding the Ingredients
Before diving into the recipe, let’s take a closer look at the key ingredients that make these no-bake cups so special. Each component plays a crucial role in achieving the desired flavor and texture.
Unsweetened Shredded Coconut
First and foremost is unsweetened shredded coconut. This ingredient not only adds a delightful chewiness to the chocolate cups but is also packed with nutritional benefits. High in fiber, healthy fats, and vitamins, shredded coconut can contribute to a balanced diet when enjoyed in moderation. The natural sweetness of the coconut enhances the overall flavor of the dessert without the need for excessive added sugars.
Coconut Cream
Next is coconut cream, an essential ingredient that lends creaminess and a silky texture to the cups. Unlike coconut milk, which is thinner and has a higher water content, coconut cream is rich and dense, making it perfect for creating a luscious filling. Its subtle coconut flavor intensifies the tropical notes, ensuring that each bite is a decadent experience.
Honey vs. Maple Syrup
When it comes to sweetening these treats, you have options: honey or maple syrup. Both natural sweeteners bring their unique flavors to the mix. Honey offers a floral sweetness that pairs nicely with the chocolate and coconut, while maple syrup provides a warm, earthy undertone. For those following a vegan diet, maple syrup is the preferred choice. Either way, these sweeteners not only enhance flavor but also contribute to binding the ingredients together.
Cocoa Powder
Cocoa powder is the backbone of any chocolate-based dessert, and its quality is paramount. Opt for a high-quality, unsweetened cocoa powder to achieve a rich chocolate flavor. This ingredient is what gives the cups their deep color and robust taste, making it a non-negotiable in the recipe.
Dark Chocolate Chips
For the ultimate chocolate experience, dark chocolate chips are a must. They add a rich, melty element that complements the other ingredients beautifully. If you’re looking for a dairy-free option, many brands offer dark chocolate chips made without milk, ensuring that everyone can enjoy this delectable treat. The intensity of dark chocolate enhances the overall flavor profile, making each bite a moment of pure bliss.
Coconut Oil
Coconut oil plays a dual role in this recipe. Not only does it help to melt the chocolate smoothly, but it also adds a subtle coconut flavor that ties everything together. Additionally, coconut oil solidifies when chilled, helping the cups maintain their shape once set.
Optional Sea Salt
Finally, consider adding a pinch of sea salt to your mixture. This optional ingredient can elevate the flavors of chocolate and coconut, creating a delightful contrast that balances sweetness. The right amount of salt brings the whole dessert to life, enhancing the overall taste experience.
Step-by-Step Recipe Instructions
Now that we’ve explored the ingredients, let’s dive into the step-by-step instructions for preparing these Delightfully Decadent No-Bake Chocolate Coconut Cups. This is where the magic happens, and it’s easier than you might think!
Preparing the Base
1. Mix the Ingredients: In a large mixing bowl, combine the unsweetened shredded coconut, coconut cream, your choice of sweetener (honey or maple syrup), cocoa powder, and a tablespoon of melted coconut oil. Use a spatula to thoroughly mix the ingredients until they are well combined. The mixture should be sticky and hold together when pressed between your fingers.
2. Achieve the Right Consistency: If the mixture feels too dry, you can add a bit more coconut cream or melted coconut oil to moisten it. Conversely, if it seems too wet, a little more shredded coconut can help absorb excess moisture. The goal is to create a cohesive mixture that can be easily molded.
Mold the Mixture
1. Choose Your Molds: You can use standard muffin tins, silicone molds, or even mini cupcake liners to shape your cups. If you’re using a muffin tin, consider lining it with parchment paper for easy removal later.
2. Press Firmly: Spoon the mixture into your chosen molds, filling each one about three-quarters full. Press the mixture down firmly using the back of a spoon or your fingers. This step is crucial for ensuring that the cups hold their shape once set. The firmer you press, the less likely they are to crumble when you remove them from the molds.
Chill Time
1. Set in the Fridge: Place the filled molds in the refrigerator for at least 30-60 minutes. Chilling is essential for allowing the coconut oil to solidify, helping the cups maintain their shape and achieving the right texture.
2. Check for Firmness: After the chilling period, check to see if the cups have set. They should feel firm to the touch and hold together well when removed from the molds. If they’re still too soft, allow them to chill for a bit longer.
By following these steps, you’ll be well on your way to creating your own batch of Delightfully Decadent No-Bake Chocolate Coconut Cups. Stay tuned for the next part of this article, where we’ll dive into the final touches and variations that will make these treats even more exciting!

Melting the Chocolate
Melting chocolate is a crucial step in achieving the perfect finish for your No-Bake Chocolate Coconut Cups. It’s essential to do this carefully to avoid burning the chocolate, which can ruin its texture and flavor.
Techniques for Melting Chocolate Without Burning
There are two primary methods for melting chocolate: the double boiler method and the microwave method.
1. Double Boiler Method: Fill a pot with a couple of inches of water and bring it to a simmer. Place a heatproof bowl on top of the pot, ensuring it doesn’t touch the water. Add your chopped chocolate to the bowl and stir frequently until melted. This gentle heat prevents the chocolate from scorching.
2. Microwave Method: Place your chocolate in a microwave-safe bowl. Heat it in 30-second intervals, stirring in between. Continue this process until the chocolate is almost fully melted, then stir until smooth. This method is quick but requires careful monitoring to prevent overheating.
The Role of Coconut Oil in Achieving a Smooth Finish
Adding coconut oil to your melted chocolate not only enhances the flavor but also improves its consistency. Coconut oil helps create a glossy finish and ensures the chocolate hardens evenly around your coconut filling. For this recipe, add about 1 tablespoon of coconut oil for every cup of chocolate you melt. This small addition makes a significant difference in the texture of your finished cups.
Topping the Cups
Once your chocolate is melted and smooth, it’s time to top your coconut cups. This step not only adds flavor but also contributes to the visual appeal of your dessert.
Instructions for Evenly Covering the Cups with Chocolate
1. Initial Layer: Using a spoon or a small ladle, pour a thin layer of the melted chocolate into each cup, making sure to coat the sides evenly. You can tilt the cups gently to ensure the chocolate reaches every corner. This initial layer should be about 1/4 inch thick.
2. Chill: Place the cups in the refrigerator for about 10 minutes to allow the first layer of chocolate to set.
3. Fill with Coconut Mixture: After the chocolate has set, spoon the coconut filling into each cup, leaving some space at the top for the final layer of chocolate.
4. Final Layer: Pour another layer of melted chocolate over the coconut filling, ensuring it covers completely. Use a spatula to smooth the top if necessary.
Creative Ways to Decorate or Customize Toppings
To add a personal touch to your No-Bake Chocolate Coconut Cups, consider the following decoration ideas:
– Chopped Nuts: Sprinkle finely chopped almonds, hazelnuts, or walnuts on top of the final chocolate layer before it sets for added crunch and flavor.
– Coconut Flakes: Toasted coconut flakes can enhance the tropical flavor and provide a beautiful finishing touch.
– Dried Fruit: Adding small pieces of dried fruit, like cranberries or apricots, gives a burst of color and a sweet-tart contrast to the rich chocolate.
– Drizzled Chocolate: Use a piping bag or a fork to drizzle contrasting chocolate over the top for a decorative effect.
Sprinkle with Sea Salt
One of the most delightful aspects of these cups is the finishing touch of sea salt. A light sprinkle of flaky sea salt enhances the chocolate’s richness and provides a pleasing contrast to the sweet coconut filling. The salt not only elevates the flavor but also enhances the visual appeal, creating a gourmet touch that invites indulgence.
Final Chill
After topping the cups, it’s crucial to allow the chocolate to set properly.
Importance of Allowing Chocolate to Set for Best Results
Place the filled cups back in the refrigerator for at least 30 minutes or until the chocolate is firm to the touch. This setting time is vital; it ensures that the chocolate hardens completely, allowing for easy removal from the cups and a clean presentation when served. Rushing this step can lead to messy cups that lose their shape and elegance.
Serve & Enjoy
Your Delightfully Decadent No-Bake Chocolate Coconut Cups are now ready to be enjoyed!
Suggestions for Serving and Pairing with Beverages
These cups make an excellent dessert for any occasion, from casual gatherings to elegant dinner parties. Serve them chilled on a beautiful platter, and consider pairing them with:
– Coffee: The rich flavors of chocolate and coconut pair beautifully with a bold cup of coffee or espresso.
– Tea: Herbal teas, particularly those with hints of vanilla or cinnamon, can complement the dessert’s tropical notes.
– Coconut Milk: For a decadent treat, serve your cups alongside a small glass of chilled coconut milk, enhancing the coconut flavor.
Nutritional Information
Understanding the nutritional benefits of your creations is essential, especially when they are as indulgent as these cups.
Breakdown of Nutritional Benefits Per Cup
Each No-Bake Chocolate Coconut Cup is packed with wholesome ingredients. Here’s an approximate breakdown of the nutritional content per cup:
– Calories: 150-200 (depending on the specific ingredients used)
– Fat: 12g (mostly healthy fats from coconut and chocolate)
– Carbohydrates: 15g
– Protein: 2g
– Fiber: 3g
Discussion on the Healthiness of Ingredients Used
The primary ingredients—dark chocolate, coconut, and coconut oil—offer various health benefits. Dark chocolate is rich in antioxidants, which can support heart health. Coconut is a great source of medium-chain triglycerides (MCTs), known for their energy-boosting properties. This recipe uses minimal added sugars, making it a healthier dessert option compared to traditional sweets.
Suitable for Various Dietary Preferences
These No-Bake Chocolate Coconut Cups are suitable for various dietary preferences:
– Vegan: Ensure you use dairy-free chocolate, and you’re good to go.
– Gluten-Free: All ingredients used are naturally gluten-free, making these cups a safe choice for gluten-sensitive individuals.
Variations and Customizations
One of the best aspects of this recipe is its versatility. Feel free to experiment with different flavors and ingredients to make these cups uniquely yours.
Ideas for Flavor Variations
– Nutty Flavor: Add a tablespoon of almond extract or hazelnut extract to the coconut mixture for a nutty twist.
– Fruit Infusion: Incorporate finely chopped dried fruits or fresh fruit purees into the coconut mixture for added sweetness and flavor.
Suggestions for Alternative Sweeteners and Their Effects on Flavor
If you prefer to use alternative sweeteners, consider:
– Maple Syrup: Provides a rich, caramel-like flavor that pairs well with chocolate.
– Agave Nectar: A mild sweetener that maintains the dessert’s tropical vibe without overpowering the coconut.
Creative Serving Ideas for Special Occasions
For parties or special gatherings, consider garnishing your cups with:
– Chocolate Curls: Use a vegetable peeler on a block of chocolate to create elegant curls as a garnish.
– Fresh Berries: Top each cup with a fresh raspberry or strawberry for a burst of color and flavor.
Conclusion
In summary, these Delightfully Decadent No-Bake Chocolate Coconut Cups are not only easy to make but also offer a delightful balance of flavors and textures. With their rich chocolate coating and luscious coconut filling, they provide a guilt-free indulgence that everyone will love.
We encourage you to experiment with this recipe, making it your own by trying different toppings, flavor variations, and serving ideas. The joy of creating a delicious dessert at home is a rewarding experience that brings satisfaction to both the cook and those sharing in the delight of a homemade treat. Enjoy your journey into the world of no-bake desserts and relish every bite of these coconut-chocolate delights!


