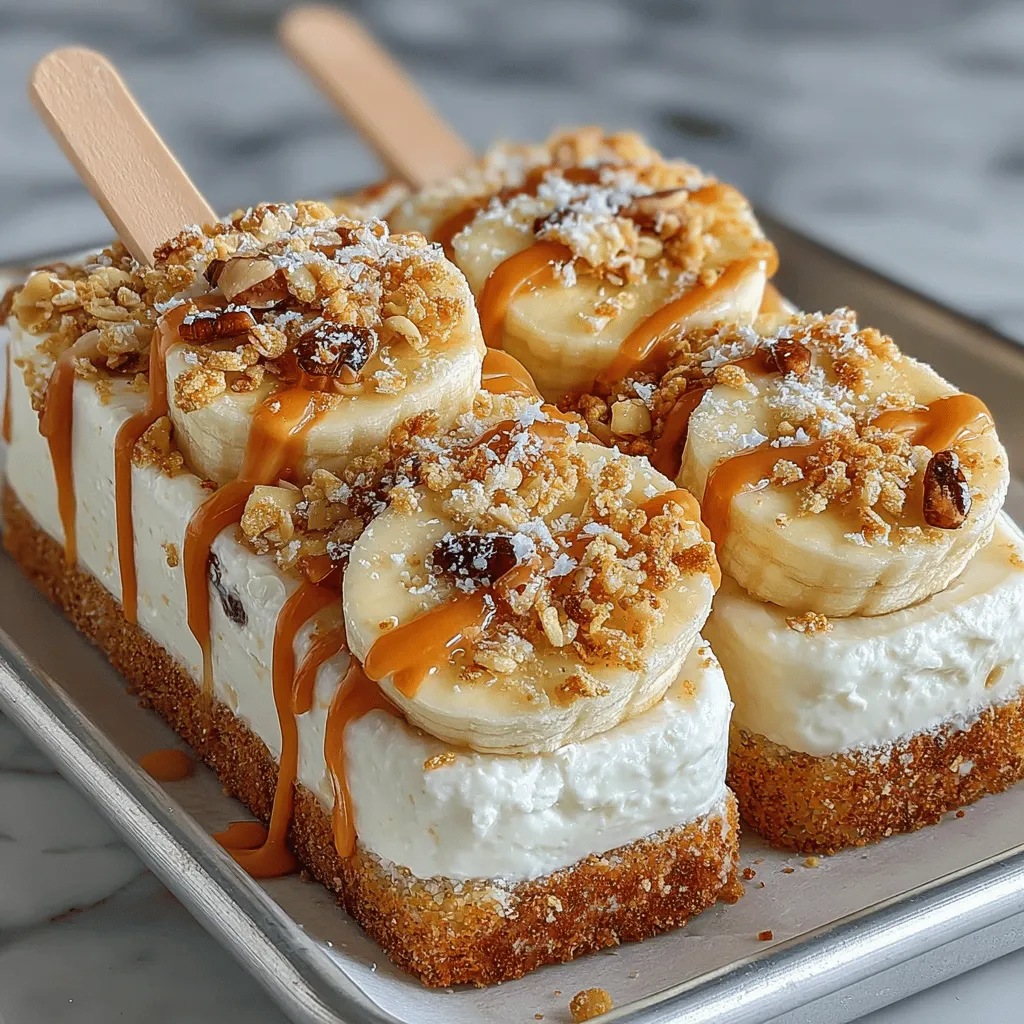
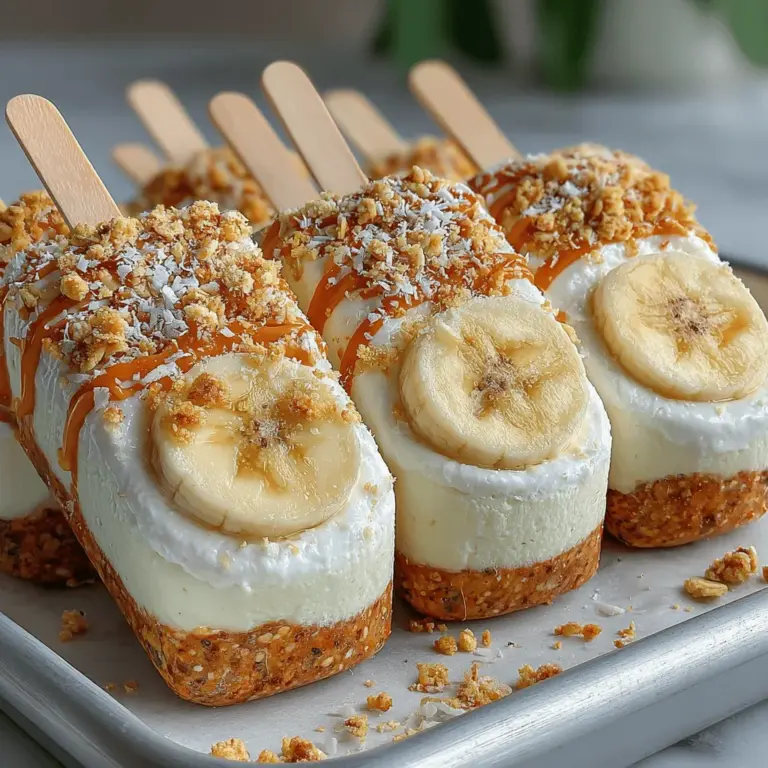
In the quest for a refreshing and healthy snack, frozen treats have become increasingly popular, particularly during the warm months. Homemade popsicles not only allow for creativity in flavor combinations but also provide an opportunity to incorporate nutritious ingredients into a fun, enjoyable treat. One such delightful creation is the Chilly Peanut Butter Banana Bliss Pops. This recipe merges the classic and beloved flavors of banana and peanut butter, resulting in a frozen dessert that is both delicious and nourishing.
The appeal of Chilly Peanut Butter Banana Bliss Pops lies in their ability to cater to all ages. Children will be drawn to the sweet, creamy taste and the fun popsicle shape, while adults can appreciate the health benefits of the ingredients. This recipe is perfect for family gatherings, backyard barbecues, or simply as a healthy afternoon snack on a hot day. With just a handful of ingredients and a straightforward preparation process, these popsicles promise a satisfying cooking experience that will leave everyone asking for more.
Ingredients Overview
Before diving into the preparation steps, it’s essential to familiarize yourself with the key ingredients that make these pops so special. Each component not only contributes to the overall flavor but also packs a nutritional punch. Here’s a detailed overview of what you’ll need:
Ripe Bananas
Ripe bananas serve as the foundation of this recipe, providing natural sweetness and a creamy texture. Rich in potassium, they support heart health and help regulate blood pressure. Additionally, bananas are a great source of dietary fiber, which aids in digestion and promotes a feeling of fullness. Their natural sugars provide a quick energy boost, making them a perfect ingredient for a refreshing snack.
Creamy Peanut Butter
Creamy peanut butter is the star of this recipe, bringing a rich, nutty flavor that pairs perfectly with bananas. Loaded with protein and healthy fats, peanut butter helps keep you satiated and can provide an energy boost. It also contains essential nutrients such as magnesium, vitamin E, and antioxidants. When choosing peanut butter, opt for natural varieties without added sugars or hydrogenated oils to maximize health benefits.
Greek Yogurt
Greek yogurt adds a delightful creaminess to the mixture while enhancing the nutritional profile of the pops. Packed with probiotics, Greek yogurt supports digestive health and can boost your immune system. Additionally, it is an excellent source of protein, calcium, and B vitamins, making it a wholesome addition to this frozen treat. For a dairy-free option, consider using plant-based yogurt alternatives.
Honey
While honey is an optional ingredient, it can serve as a natural sweetener to enhance the flavor of your pops. It offers a unique taste profile and is a healthier alternative to refined sugars. Honey is also known for its antibacterial properties and can provide a quick energy boost. If you prefer a lower-sugar option, you can easily omit this ingredient or adjust the quantity to your liking.
Vanilla Extract
A splash of vanilla extract elevates the flavor of the Chilly Peanut Butter Banana Bliss Pops, adding a sweet and aromatic note that complements the other ingredients beautifully. Vanilla extract contains antioxidants and can enhance mood and cognitive function, making it a simple yet effective way to enrich your frozen treat.
Granola or Chopped Nuts
For those who enjoy a little crunch in their pops, granola or chopped nuts are fantastic additions. Not only do they provide texture, but they also deliver added nutrients. Nuts are a great source of healthy fats, protein, and essential vitamins and minerals, while granola can offer whole grains and fiber. Choose a variety that suits your taste, and feel free to get creative with different toppings!
Popsicle Sticks and Wrapping Supplies
While not a food ingredient, popsicle sticks and wrapping supplies are vital for the preparation process. Popsicle sticks allow for easy handling and enjoyment of your frozen creations, while wrapping supplies, such as parchment paper or plastic wrap, help keep the popsicles fresh in the freezer until you’re ready to indulge.
Preparation Steps
Now that you have all the ingredients laid out, it’s time to get started on creating your Chilly Peanut Butter Banana Bliss Pops. The preparation process is straightforward and can be completed in just a few easy steps:
Step 1: Gather Your Ingredients
Begin by gathering all of your ingredients and kitchen tools. You’ll need ripe bananas, creamy peanut butter, Greek yogurt, honey (if using), vanilla extract, granola or chopped nuts, and popsicle sticks. Having everything ready will streamline the process and ensure you don’t miss any key components.
Step 2: Blend the Base
In a blender or food processor, combine the ripe bananas, creamy peanut butter, Greek yogurt, honey (if using), and vanilla extract. Blend the ingredients until you achieve a smooth and creamy mixture. It’s important to ensure that all components are well incorporated, as this will contribute to the overall texture of your popsicles.
Step 3: Taste and Adjust
After blending, take a moment to taste the mixture. This is your opportunity to adjust the sweetness or flavor to your preference. If you find it needs a little more sweetness, you can add an extra drizzle of honey or a splash more vanilla extract. Blend again briefly to incorporate any adjustments.
Step 4: Incorporate Crunchy Elements
Once you’re satisfied with the base mixture, it’s time to add the crunch. Gently fold in your choice of granola or chopped nuts. This step adds texture and an extra layer of flavor to the pops. Be careful not to overmix, as you want the crunchy elements to remain somewhat intact.
Step 5: Pour into Molds
Carefully pour the blended mixture into popsicle molds, filling each mold to the top. If you prefer a layered effect, you can alternate between the banana-peanut butter mixture and additional layers of granola or chopped nuts. This not only enhances the visual appeal of your pops but also adds delicious surprises with each bite.
Step 6: Insert Popsicle Sticks
Once the molds are filled, insert popsicle sticks into the center of each mold. Ensure that the sticks are placed upright and secure, as they will serve as the handles for your frozen treats. If the mixture is too thick to hold the sticks upright, you can place the molds in the freezer for about 30 minutes to allow it to firm up slightly before inserting the sticks.
Step 7: Freeze
Place the filled molds in the freezer and allow them to freeze for at least 4-6 hours, or until solid. It’s best to leave them overnight for optimal firmness. During this time, the flavors will meld beautifully, resulting in a deliciously creamy and nutritious popsicle.
Step 8: Remove from Molds
After the freezing period, carefully remove the pops from their molds. If you encounter any difficulty, run warm water over the outside of the molds for a few seconds to help release them. Enjoy the satisfaction of unveiling your homemade Chilly Peanut Butter Banana Bliss Pops, ready to be devoured by family and friends.
With these initial steps, you’re well on your way to creating a deliciously healthy frozen treat that is sure to become a family favorite. The combination of flavors and textures in these pops will delight your taste buds while providing a guilt-free indulgence. Stay tuned for the next section, where we’ll explore serving suggestions and storage tips to keep your Chilly Peanut Butter Banana Bliss Pops fresh and enjoyable for days to come.

Preparing the Bananas
To create the perfect Chilly Peanut Butter Banana Bliss Pops, start by preparing your bananas. Choose ripe, but not overripe, bananas for optimal sweetness and texture. Begin by peeling the bananas and then cutting each banana in half. Using a sharp knife, slice each banana crosswise, ensuring that each piece is approximately 4-5 inches long. This length is perfect for pops, allowing them to fit comfortably in your hand.
Next, insert a popsicle stick into the cut end of each banana half. You want to push the stick in about two-thirds of the way, ensuring it is secure enough to hold the weight of the banana when dipped in the peanut butter mixture. If the bananas are particularly soft, gently twist the stick as you insert it to avoid breaking the banana. Once you have prepared all your bananas, place them on a parchment-lined baking sheet to get ready for the next steps.
Making the Peanut Butter Mixture
The peanut butter mixture is the star of the show, and achieving the right consistency is key. In a mixing bowl, add 1 cup of creamy or crunchy peanut butter. If you prefer a sweeter pop, consider adding 2 tablespoons of honey or maple syrup to the peanut butter. This not only enhances the sweetness but also adds a delightful richness to the mixture.
Using a spatula or a hand mixer, blend the peanut butter and optional sweetener until the mixture is smooth and creamy. If the peanut butter is too thick, you can introduce a tablespoon of coconut oil or a splash of almond milk to achieve a more pourable consistency. The goal is to have a luscious peanut butter mixture that will easily coat the bananas without being too runny.
Coating the Bananas
Once your peanut butter mixture is ready, it’s time to coat the bananas. First, ensure that your bananas are securely placed on the baking sheet. Using a spoon or a small spatula, generously coat each banana half in the peanut butter mixture, allowing it to cover all sides evenly. Be mindful not to apply too thick a layer, as this may result in excess peanut butter dripping off when you freeze them.
To avoid any mess, you can also dip the banana halves directly into the bowl of peanut butter mixture. Hold the stick and gently swirl the banana until fully coated. After coating, give each banana a slight shake to remove any excess peanut butter, then return them to the baking sheet. This will help create a smooth finish on the pops once they freeze.
Adding Crunch
Adding texture to your Chilly Peanut Butter Banana Bliss Pops is where the fun begins! You can choose from a variety of toppings to enhance both flavor and crunch. Chopped nuts, such as almonds, peanuts, or walnuts, are excellent choices for a delightful crunch. For a sweeter option, consider using mini chocolate chips or sprinkles.
To apply the toppings, place your chosen crunchy ingredients in a shallow dish. After coating each banana with peanut butter, roll or sprinkle the toppings over the banana while the mixture is still wet. This ensures that the toppings adhere well. If you prefer a less messy method, you can also sprinkle the toppings over the bananas using your fingers or a spoon after you’ve coated them.
Freezing Process
Proper freezing is crucial for the perfect Chilly Peanut Butter Banana Bliss Pops. Once all the bananas are coated and garnished with toppings, place the baking sheet in the freezer. Allow the pops to freeze for at least 2-3 hours, or until they are solid. To check if they are ready, gently tug on the pops; if they feel firm and hold their shape, they are good to go.
For optimal storage, once frozen, transfer the pops into an airtight container or wrap them individually in wax paper or plastic wrap to prevent freezer burn. These pops can be stored in the freezer for up to two months, making them a convenient and healthy treat to have on hand.
Nutritional Information
Each Chilly Peanut Butter Banana Bliss Pop is not only delicious but also packed with nutrition. Here’s a breakdown of the nutritional information per pop (based on a standard recipe using one banana half and peanut butter):
– Calories: 150
– Protein: 4g
– Total Fat: 8g
– Saturated Fat: 1g
– Carbohydrates: 19g
– Dietary Fiber: 2g
– Sugars: 7g
Additionally, these pops are a good source of vitamins and minerals, thanks to the bananas which provide potassium, vitamin C, and B6. The peanut butter adds protein, healthy fats, and vitamin E.
Chilly Peanut Butter Banana Bliss Pops fit perfectly into various diets, including vegetarian and gluten-free options. Just ensure that the peanut butter and any toppings used are certified gluten-free if you are following a strict gluten-free diet.
Serving Suggestions
There are many delightful ways to enjoy Chilly Peanut Butter Banana Bliss Pops, whether as a fun dessert or a nutritious snack. Here are some serving suggestions to enhance your experience:
Pairing Ideas
These pops pair wonderfully with refreshing beverages. Consider serving them alongside a fruit smoothie, a glass of almond milk, or flavored sparkling water for a delightful summer treat. The combination of creamy peanut butter and refreshing banana complements fruity flavors beautifully.
Presentation Tips
Make your pops the star of your gathering by presenting them in a fun and creative way. Use a decorative platter or a popsicle stand to display the pops. You can even create a “pop bar” with various toppings and dips for guests to customize their treats. This interactive element is especially appealing for kids and will make any gathering feel festive!
Variations
The beauty of Chilly Peanut Butter Banana Bliss Pops lies in their versatility. Feel free to customize them to your taste. Try swapping the peanut butter for almond butter, cashew butter, or sunflower seed butter for a different flavor profile. You can also experiment with different fruits, such as strawberries or kiwi slices, which can be frozen alongside the bananas for added variety. For a gourmet touch, consider drizzling melted dark chocolate over the pops before serving.
Conclusion
Chilly Peanut Butter Banana Bliss Pops are a simple yet delightful treat that combines the natural sweetness of bananas with the rich flavor of peanut butter. With easy preparation steps and a variety of customization options, these pops are perfect for both kids and adults alike. Not only are they delicious, but they also provide a nutritious snack option that can fit into a balanced diet.
Encouraging creativity in the kitchen, these homemade pops bring joy and satisfaction, especially during hot summer days. So why not gather the ingredients and whip up a batch of Chilly Peanut Butter Banana Bliss Pops? Enjoy the delicious flavors while reaping the benefits of wholesome ingredients. With this recipe in your repertoire, you’ll have a delicious and healthy treat that everyone will love, making it a fantastic addition to your summer snack list.


